Is another device on the network using your IP address? Here’s how to fix it


Seeing the warning “another device on the network is using your IP address” can be a little alarming. This error message indicates an Internet Protocol (IP) address conflict, or in simple terms, it means two devices on the same network ended up with the same IP address.
When that happens, your network gets confused about where to send data, and one or both devices may lose internet connectivity. The good news is that an IP conflict is usually fixable with some straightforward troubleshooting.
In this guide, we’ll explain what causes an IP address conflict, how to identify which device is conflicting, and how to solve the issue on Windows and Mac. We’ll also cover ways to prevent IP conflicts in the future.
What causes an IP address conflict?
Before looking at the fixes, it helps to understand why you might see an IP conflict error. In a network, every device, including a computer, phone, printer, etc., is supposed to have a unique IP address. An IP address is a number used to identify the device and enable it to communicate with other devices by specifying its location.
If two devices accidentally share the same IP address, a network IP conflict occurs, and the devices can’t communicate properly, resulting in crashes or slowdowns.
How does an IP address conflict occur?
There are several common ways an IP address conflict can occur on a local network:
- Dynamic Host Configuration Protocol (DHCP) glitches or overlaps: Your router uses DHCP to automatically assign IP addresses to devices. If it malfunctions or two devices request an address simultaneously, it can issue duplicate IPs.
- Static/manual IP address conflicts: These happen when you give a device a fixed IP address that’s already in use or within the router’s automatic (DHCP) range. For example, if you set your printer to 192.168.1.50 and your router later gives that same IP to your laptop, they’ll clash. To avoid this, use a unique IP outside the router’s auto-assigned range.
- Multiple routers or rogue DHCP servers: If more than one device is handing out IP addresses, like a second router or misconfigured Wi-Fi extender, it might give the same IP to different devices. This can also happen if a rogue device starts assigning IPs.
- Device reusing an old IP (sticky IP): Some devices, like phones or other internet-connected devices, try to reuse their last IP when reconnecting. If the router has already given that IP to something else, it causes a conflict.
- Network configuration errors or glitches: Sometimes, a router mix-up or outdated software can cause devices to think they’re allowed to use the same IP. Things like overlapping network settings or bugs can lead to these conflicts, though they’re not common on home networks.
In most home scenarios, IP conflicts boil down to DHCP issues or human error with static IPs. Having a stable and secure network helps reduce unwanted IP conflicts while safeguarding your data from intruders.
Signs that your device is experiencing an IP conflict
The easiest way to find out that your device has an IP conflict is through an error message. While the wording varies by system, the message usually means two devices are trying to use the same IP address.
| Explicit error notifications | macOS | Windows |
| Another device on the network is using your computer’s IP address | Windows has detected an IP address conflict
Another computer on this network has the same IP address as this computer |
If you’re using a smartphone or tablet, the warning might not be clear. You might just see a “Network Error” or a note in the Wi-Fi settings saying “IP address conflict” or “IP address already in use.”
Another sign of an IP conflict is frequent disconnects from Wi-Fi or Ethernet. When two devices share the same IP, one or both may lose access to the internet or local network. It often feels like a random internet outage: webpages won’t load, and apps that need a connection stop working.
Finally, your network admin tools or logs can show conflicts. By checking your router’s logs or using network management tools, you might see warnings like “IP address 192.168.1.X already in use” or labels such as “Bad Address” for one of the devices.
Once an IP conflict surfaces, it’s only a matter of time before you notice disruptions. The good news is that tracking down the offending device is fairly simple.
How to identify the conflicting device
The first step is identifying which device is causing the IP conflict. If you only have a few gadgets, you might be able to figure it out through trial and error by turning them off one by one. But on larger networks, it’s quicker to log into your router’s admin panel. You can also use IP scanning tools.
Checking connected devices on Windows, Mac, and router
On Windows using the Command Prompt
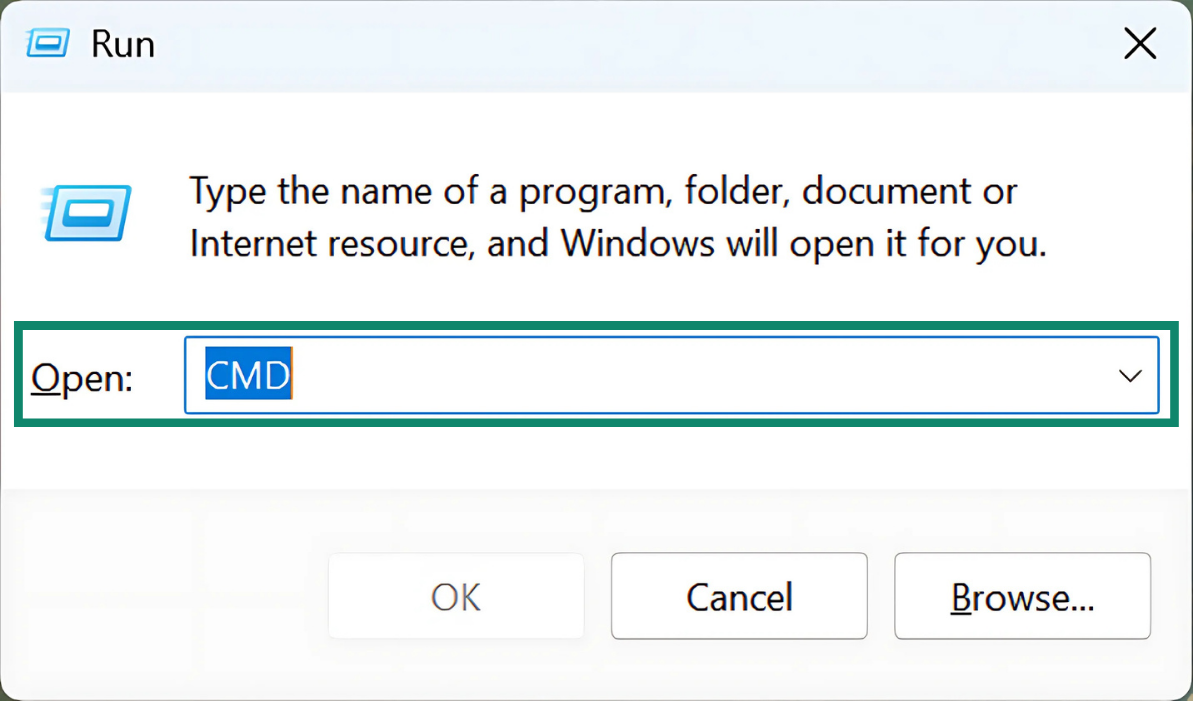
- Press Win + R to open the Run dialog, type “CMD” into the address bar, and hit Enter.
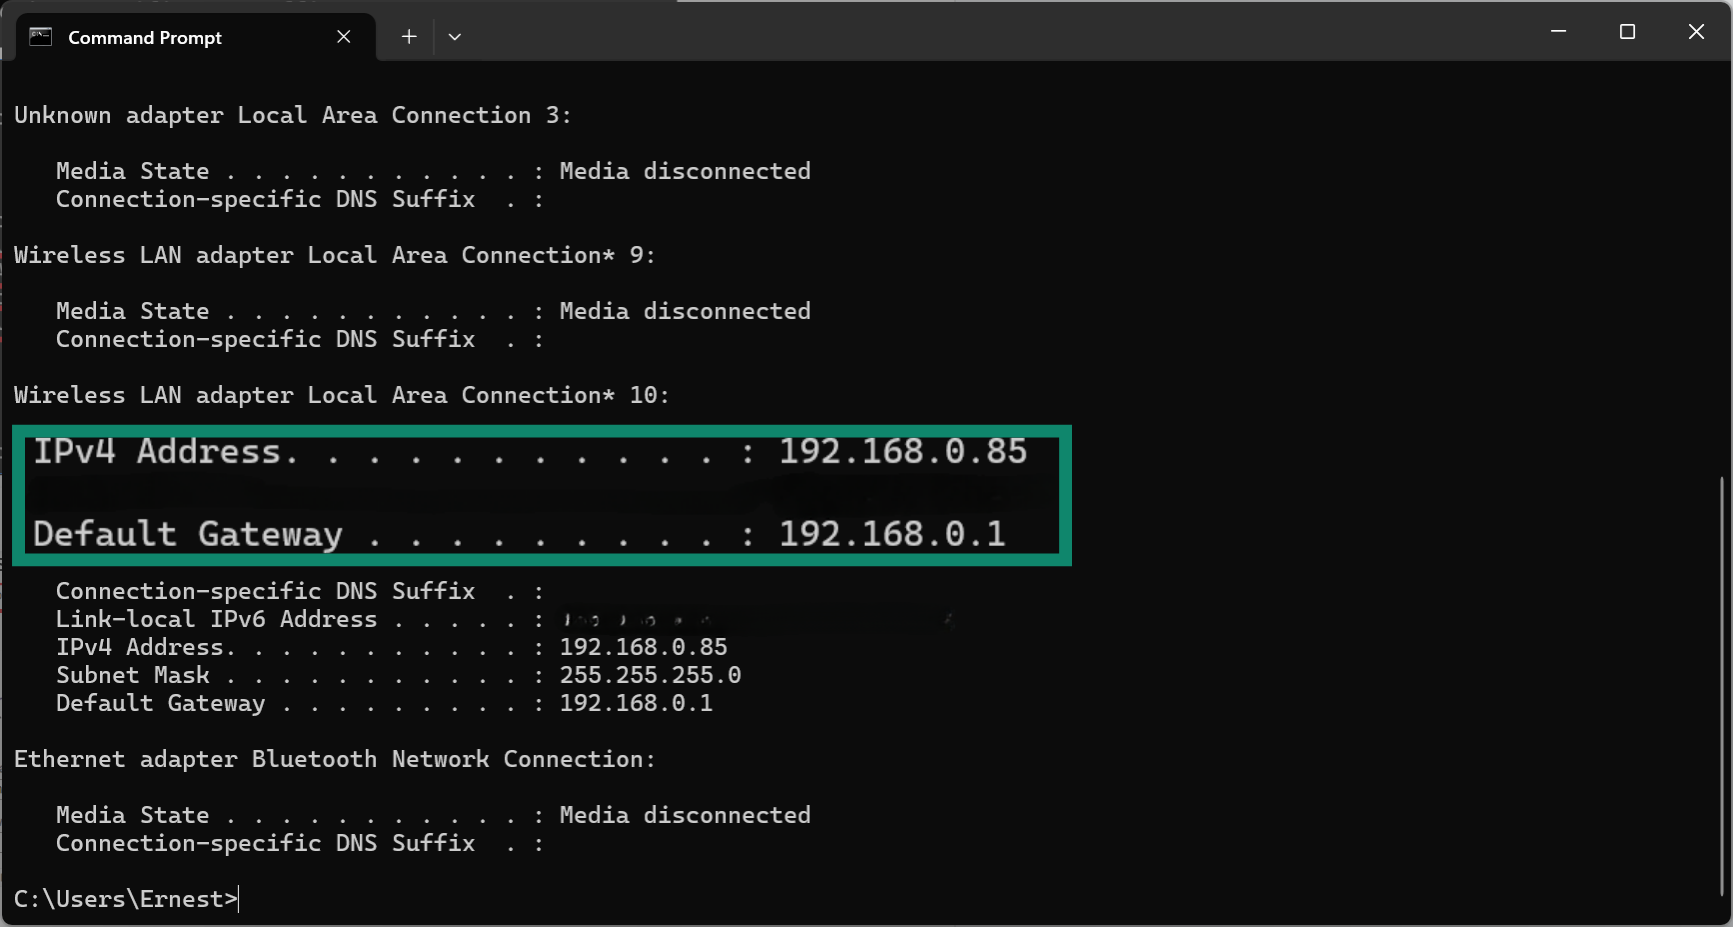
- Type “ipconfig” and hit Enter to open your network information.
- Note your IPv4 Address (or, if applicable, your IPv6 Address) and the Default Gateway address.
On Mac
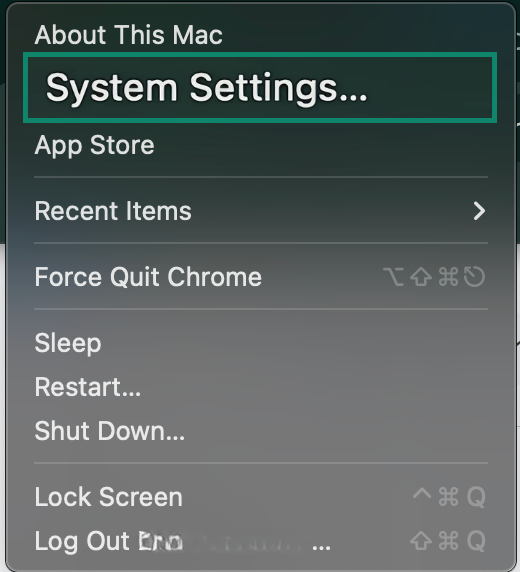
- Access the Apple menu, then select System Settings.
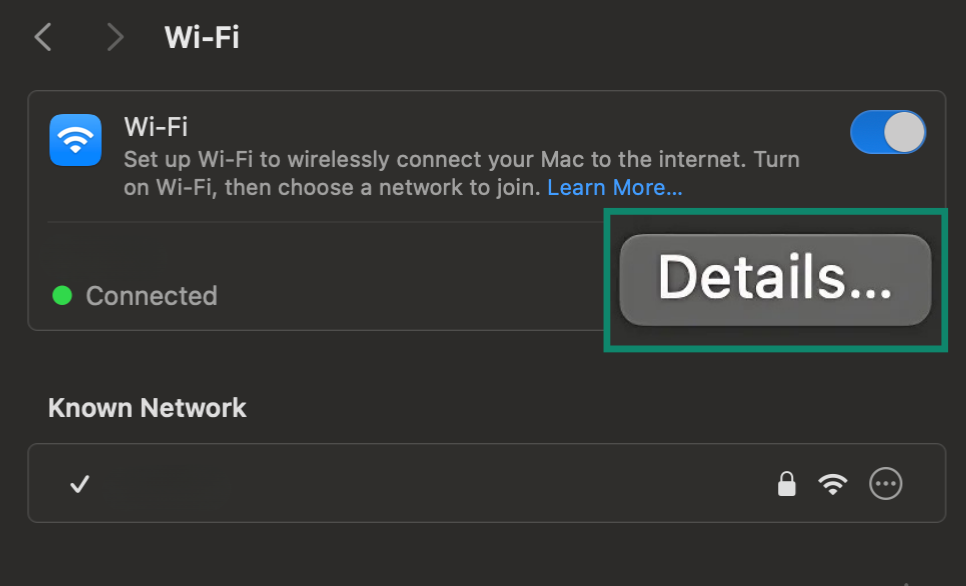
- Click Network and find your current connection (Wi-Fi or Ethernet).

- Look for Details or Advanced.
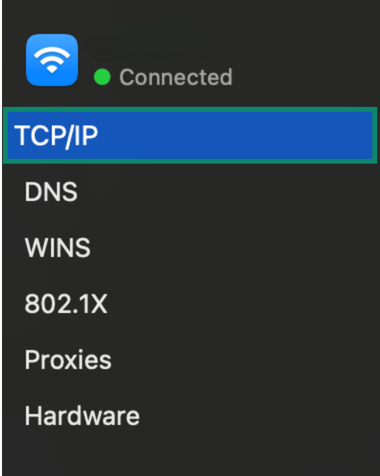
- Select TCP/IP, and you’ll see your IP address and the router’s IP there.
Using your router
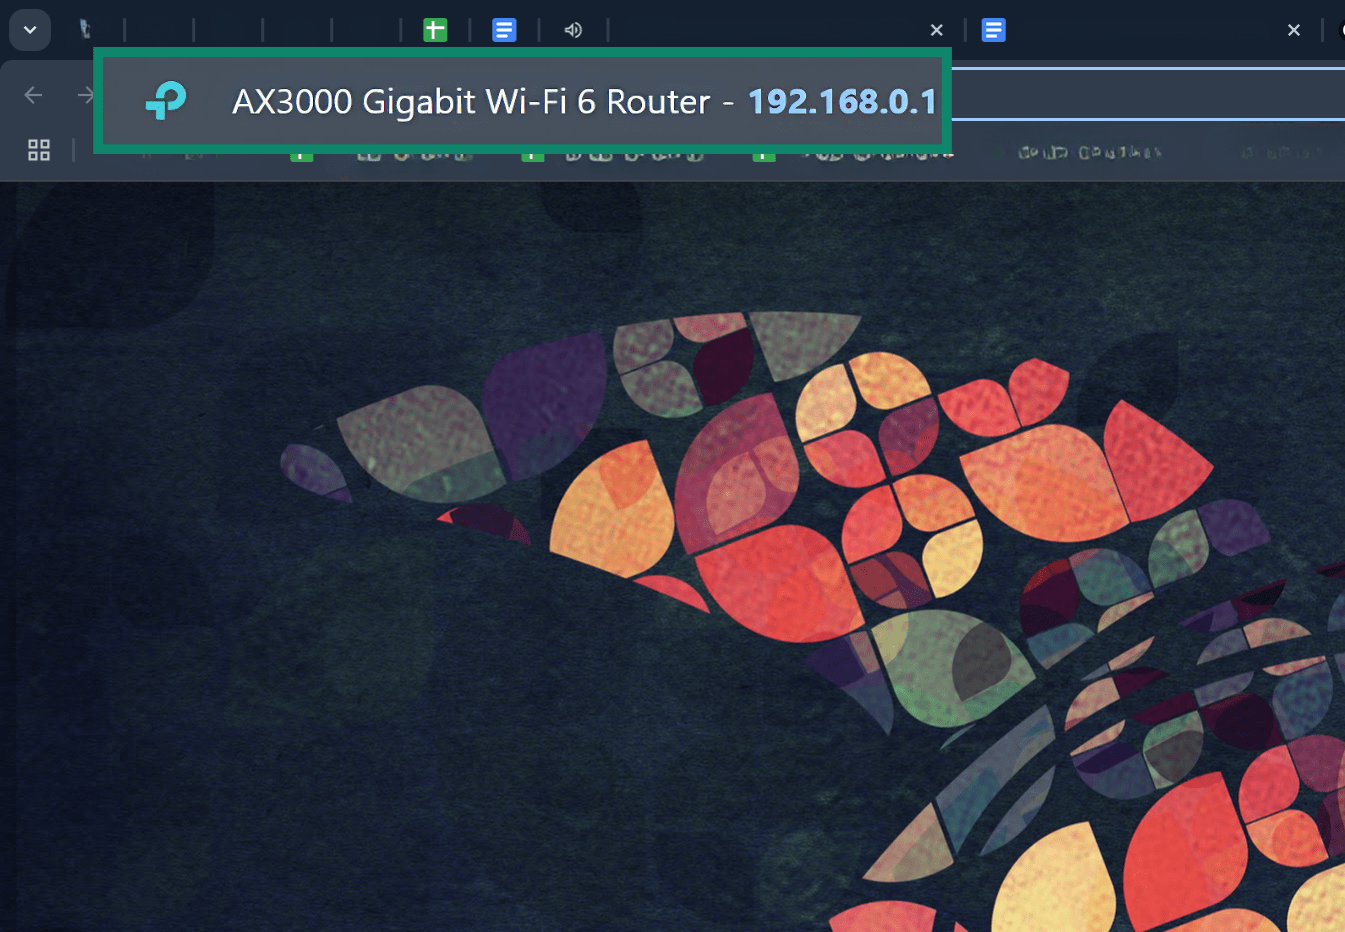
For the purposes of this tutorial, we’ll be using a TP-Link Wi-Fi 6 router. If you’re using a different brand, don’t worry, the steps are pretty similar. These instructions work on both macOS and Windows.
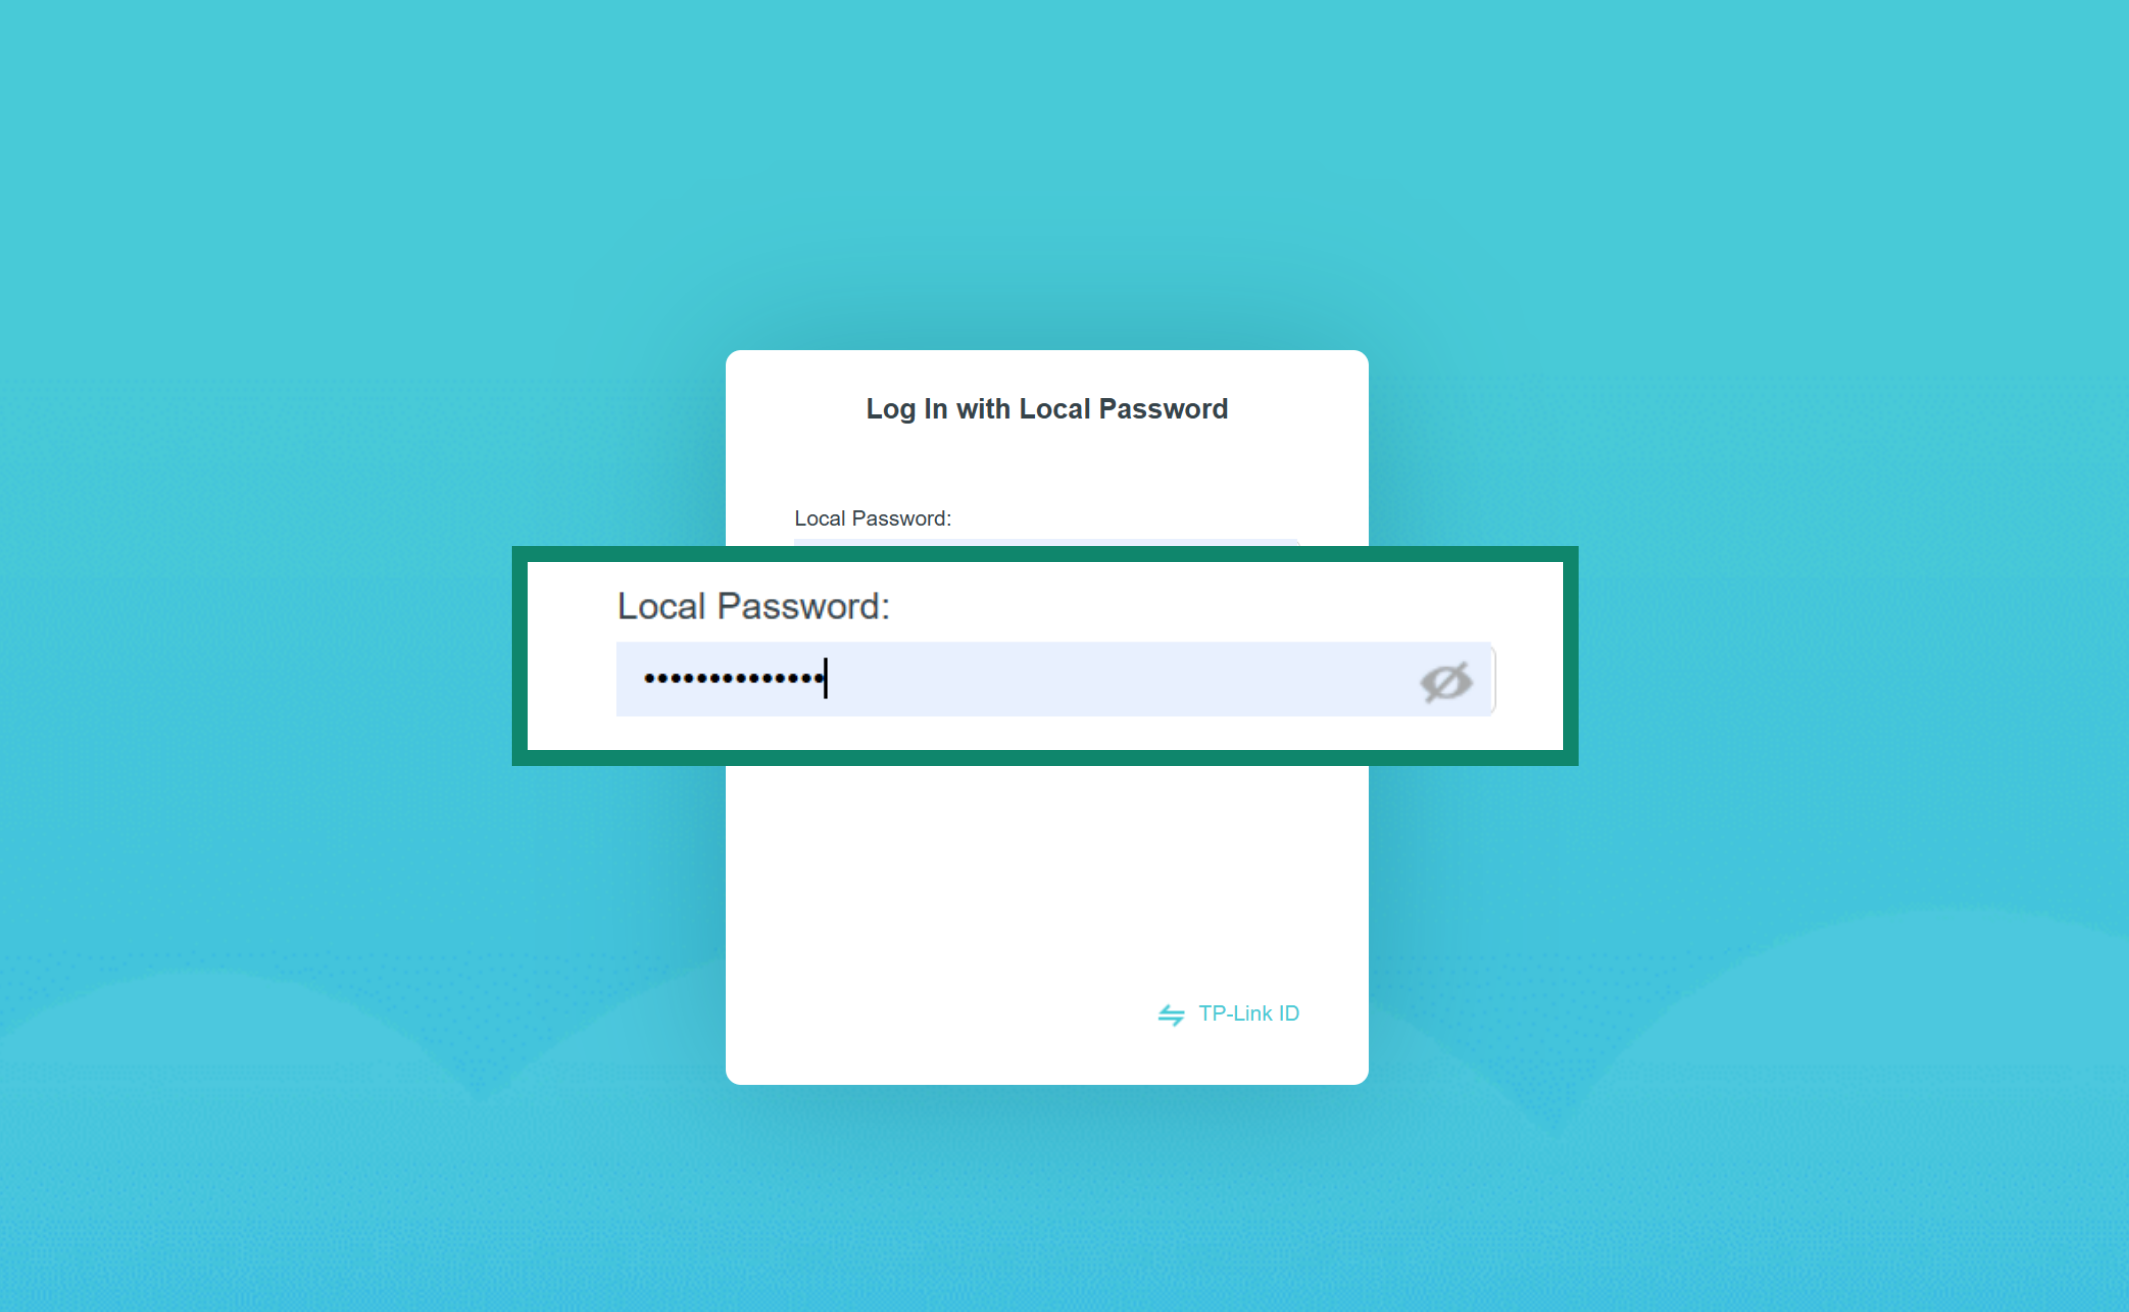
- Type the gateway IP into your browser address bar to log into your router’s admin panel.
- Log into your router’s dashboard using your admin login and password.
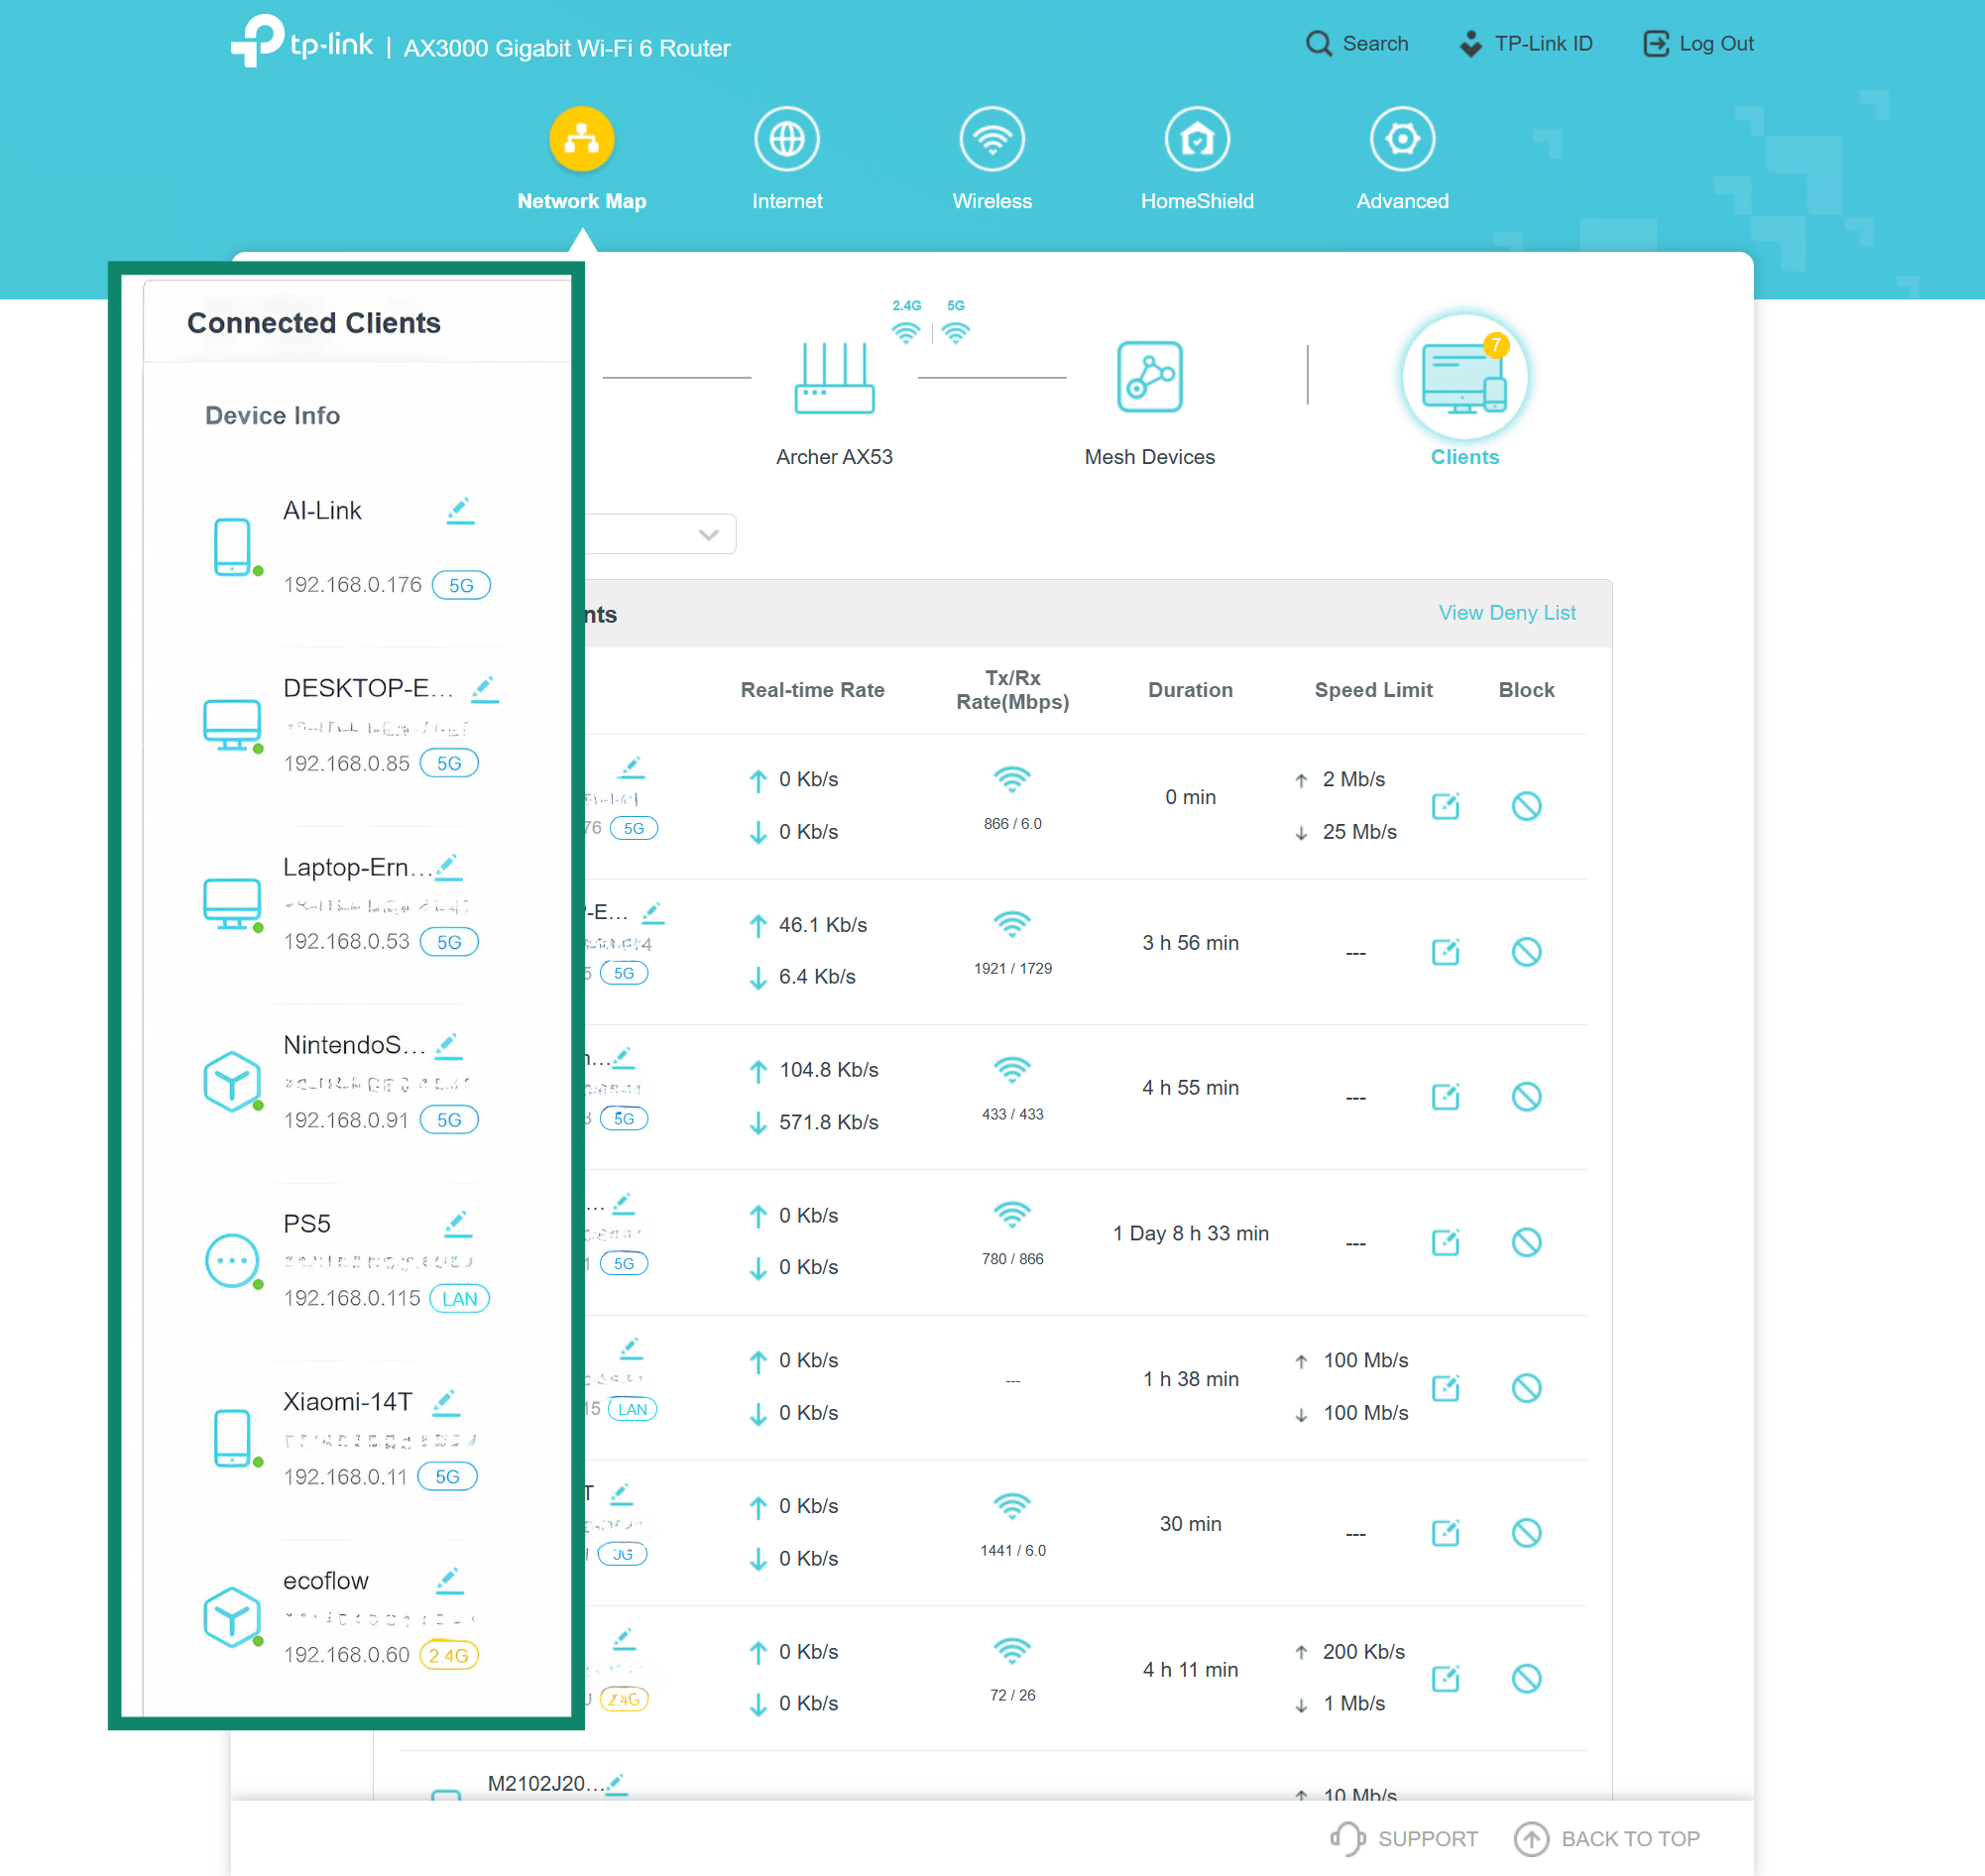
- Once inside, check for the Clients, Connected Devices, or Attached Devices options.

- Disable the device using the same IP address.
Using IP scanning tools to detect conflicts
If you can’t access your router or if you have a lot of devices, which makes it difficult to find the duplicate one, you can use dedicated network checking tools. These tools scan your local network and list all active IP addresses and devices, which can make it easier to catch duplicates.
- Address Resolution Protocol (ARP) network tools: Utilities like Arp-scan or Arping can show you when there are two different ARP responses to your initial query, confirming that there is an IP conflict, but these tools are primarily designed for Linux. On macOS, Arping can be installed via Homebrew. On Windows, you can try the built-in arp /a command to view the ARP cache, though it’s less reliable for detecting conflicts.
- Mobile network scanner apps: If you prefer to use your phone or tablet, apps like Fing for iOS and Android can scan your Wi-Fi network and list connected devices. Fing will display device names, IPs, and manufacturers. You can quickly spot if two devices share an IP or if an unfamiliar device is present.
- Professional tools: In larger networks, such as in an office, administrators use advanced IP Address Management (IPAM) tools that offer conflict detection and alerts. These tools pinpoint IP conflicts automatically.
How to fix “another device on the network is using your IP address” step by step
It’s time for action. Below are the most direct ways to resolve conflicts on Windows, Mac, and even the router itself. In many cases, a quick reboot solves the problem. Other times, you may need deeper adjustments, like assigning a static IP or resetting your system’s network settings.
1. Restart your router and all connected devices
Restarting your router helps resolve duplicate IP addresses because it resets the network’s DHCP lease process.
To fix potential IP conflicts, start by powering off your router and unplugging it for at least 10 seconds. While it’s off, shut down all devices connected to your network, including computers, phones, consoles, and smart TVs. Once everything is off, plug the router back in and wait for it to fully power up. After that, you can turn your devices back on and reconnect them to the network.
This refresh often clears outdated DHCP leases and reassigns addresses. It’s a simple fix that solves many IP address conflict scenarios immediately.
2. Renew DHCP lease (Windows and Mac)
If a simple restart doesn’t do the trick, the next step is to force your device to grab a new IP address from the router. This is called renewing your DHCP lease. Essentially, you’re telling your computer, “Let go of the old IP and ask for a new one.” Both Windows and Mac allow you to do this easily:
On Windows:
- Press Win + R to open the Run dialog, type “CMD,” and click OK.
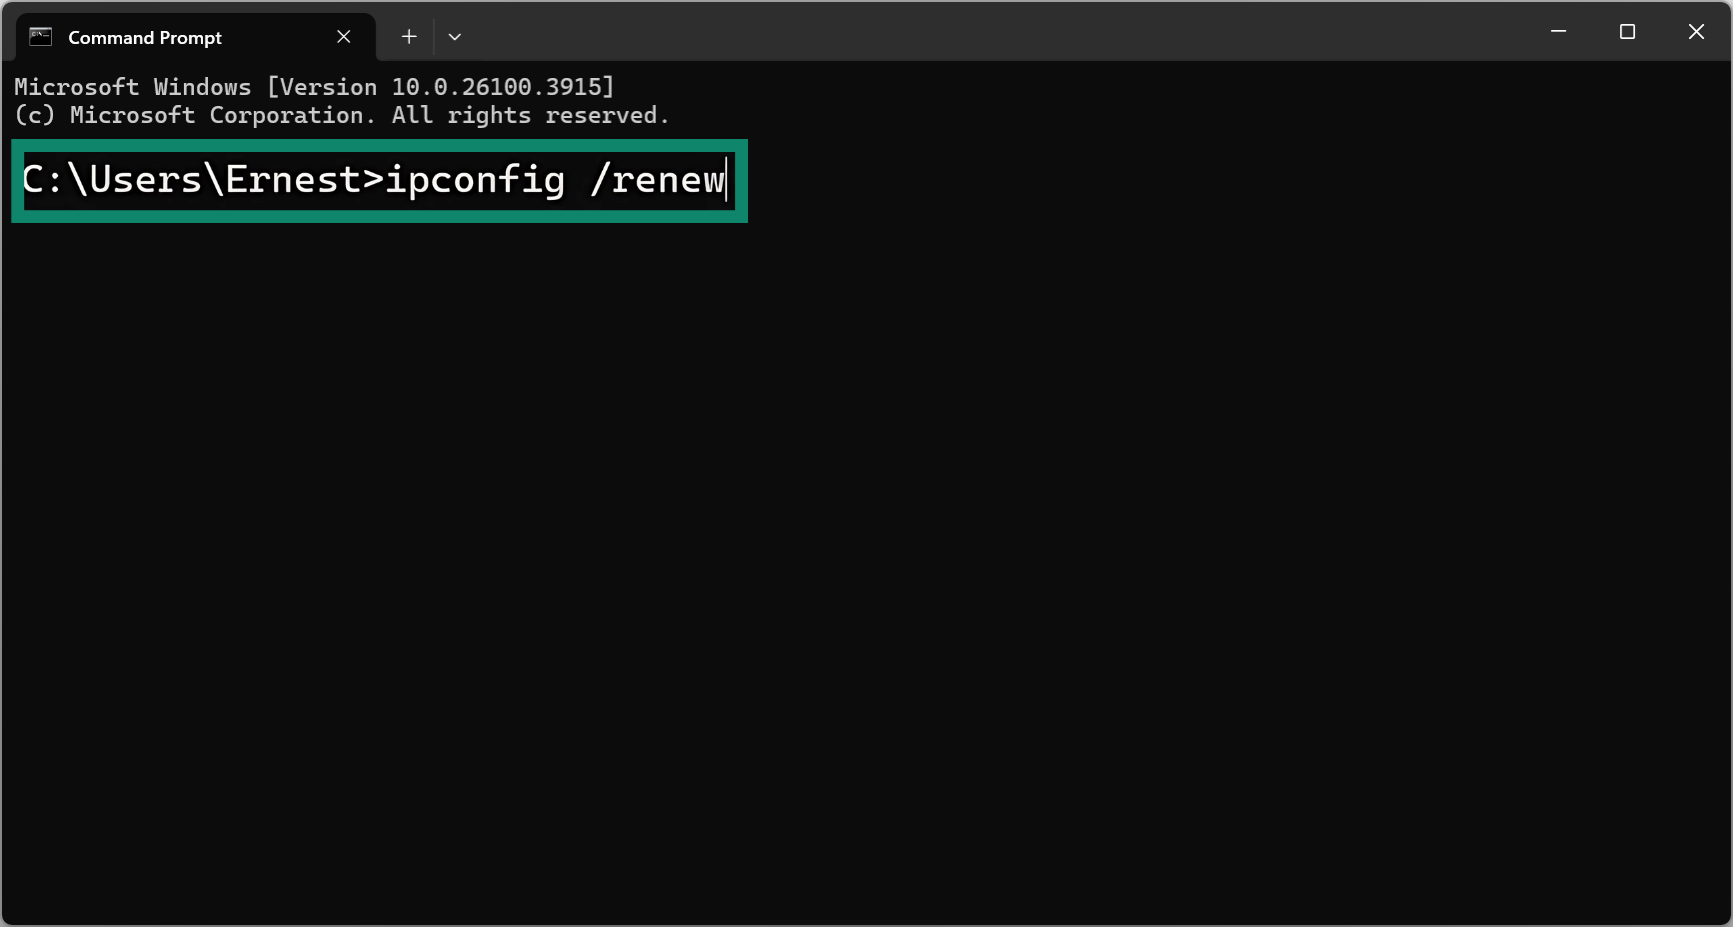
- In Command Prompt, enter “ipconfig /release.”
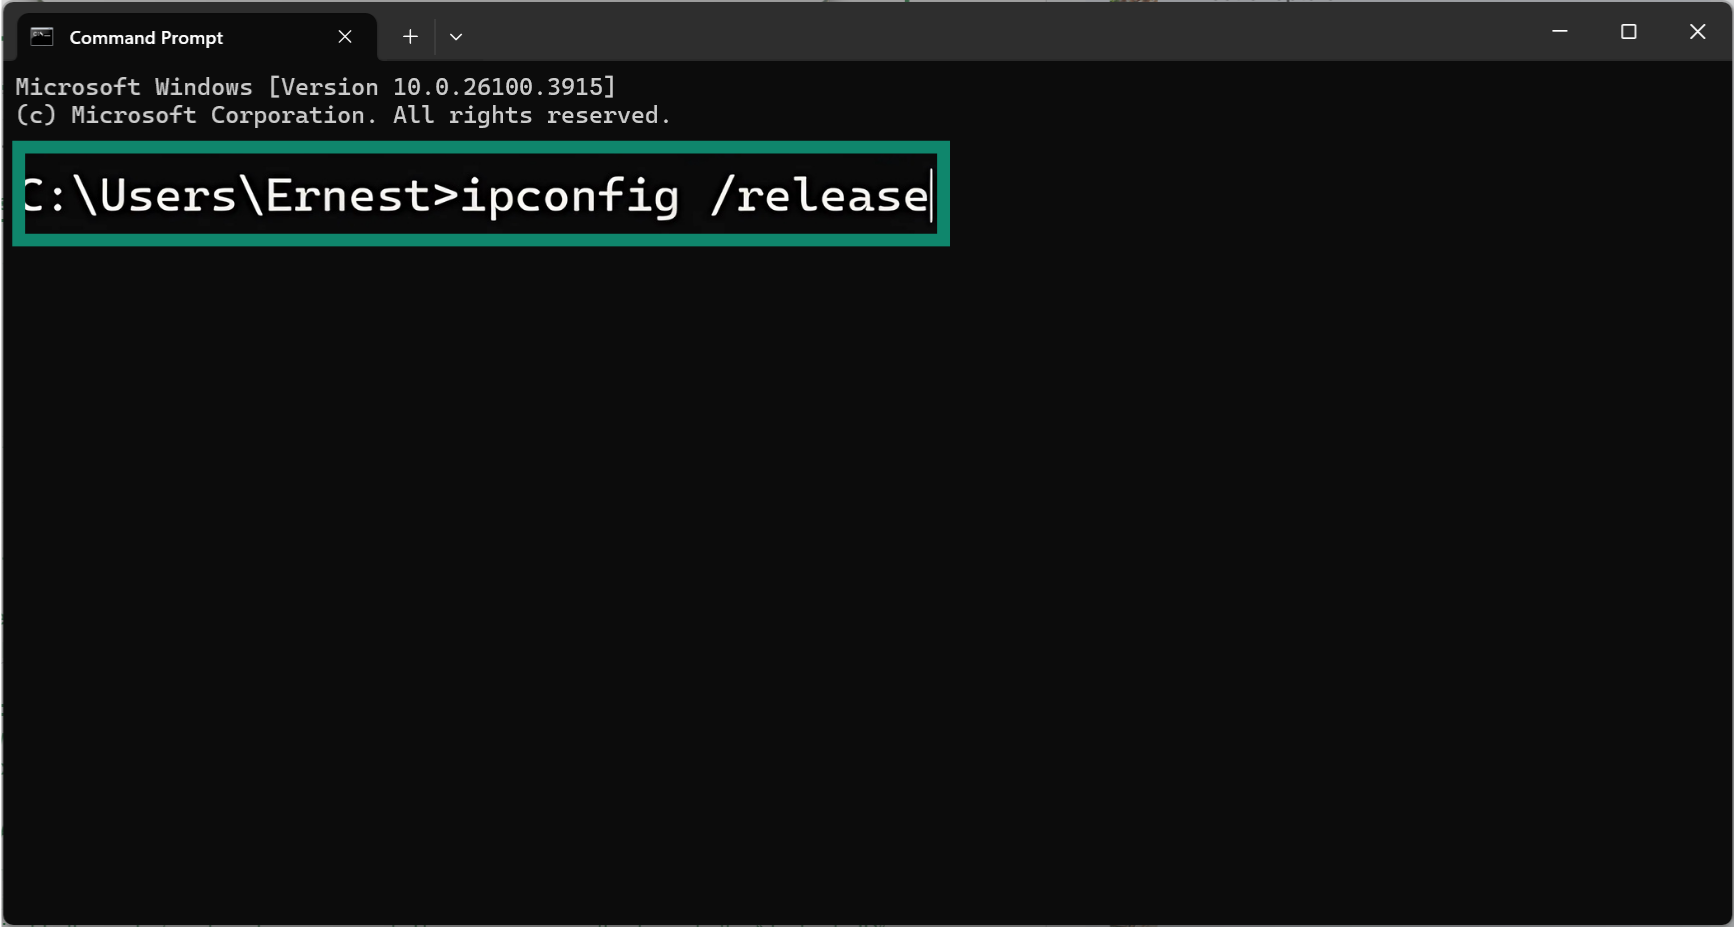
- Enter the following command: “ipconfig /renew.”
- Wait for the commands to finish, then close Command Prompt.
On Mac:
- Select the Apple menu and choose System Settings.
- Go to Network and pick your current connection (Wi-Fi or Ethernet).
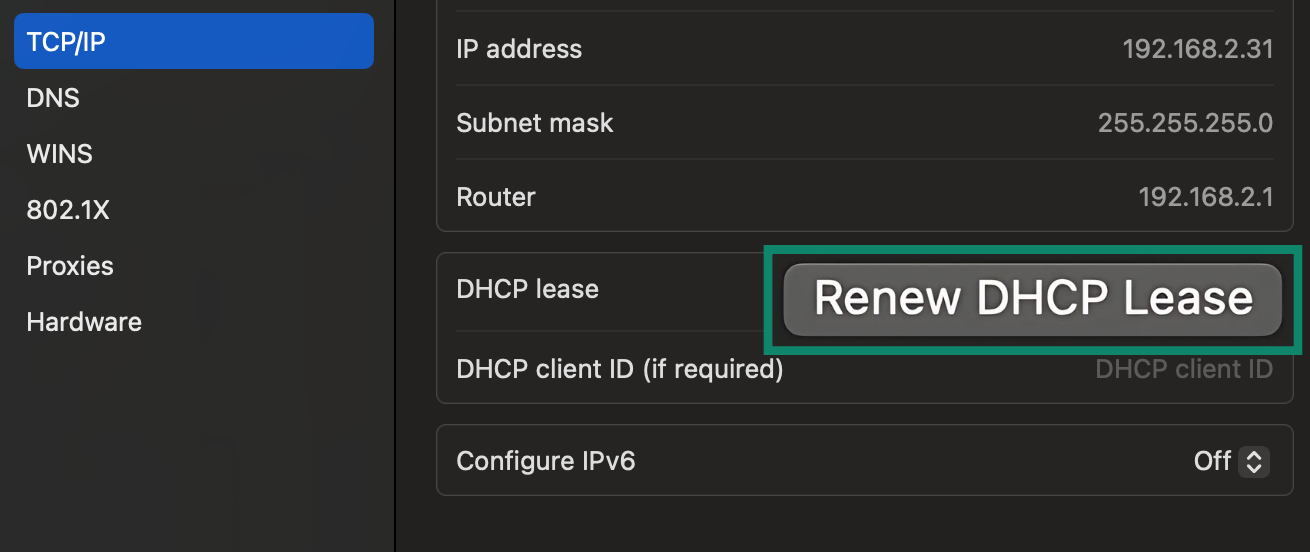
- Select Details (or Advanced in older macOS versions) and open the TCP/IP tab.
- Press Renew DHCP Lease and confirm.
After these steps, your device should grab a fresh address. If the error message still appears, keep reading.
Tip: On both Windows and Mac, simply reconnecting to the Wi-Fi can sometimes renew the IP as well. Turning your Wi-Fi off and on (via the Wi-Fi menu or a hardware switch) or disconnecting from the network and reconnecting accomplishes a release/renew in one go.
3. Assign a static IP address
Normally, devices get dynamic IPs from the router, which can change over time. By assigning a static IP, you can make sure your device always uses an address you know is free and not subject to the router’s automatic assignment. This can permanently eliminate the “duplicate IP” issue for that device.
First, you need to pick an IP address that isn’t currently in use and ideally won’t be given out to another device by your router. Check your router’s DHCP range; many routers hand out addresses between 192.168.1.2 and 192.168.1.200.
You can log into the router and see its DHCP settings to find this range. Choose an IP outside of that range or high up in the range. For example, if DHCP goes up to 192.168.1.200, you can pick 192.168.1.210 for your device. Alternatively, pick a low number not used (like 192.168.1.50) and then set your router’s DHCP range to start above that.
Now it’s time to assign that static IP address.
On Windows:
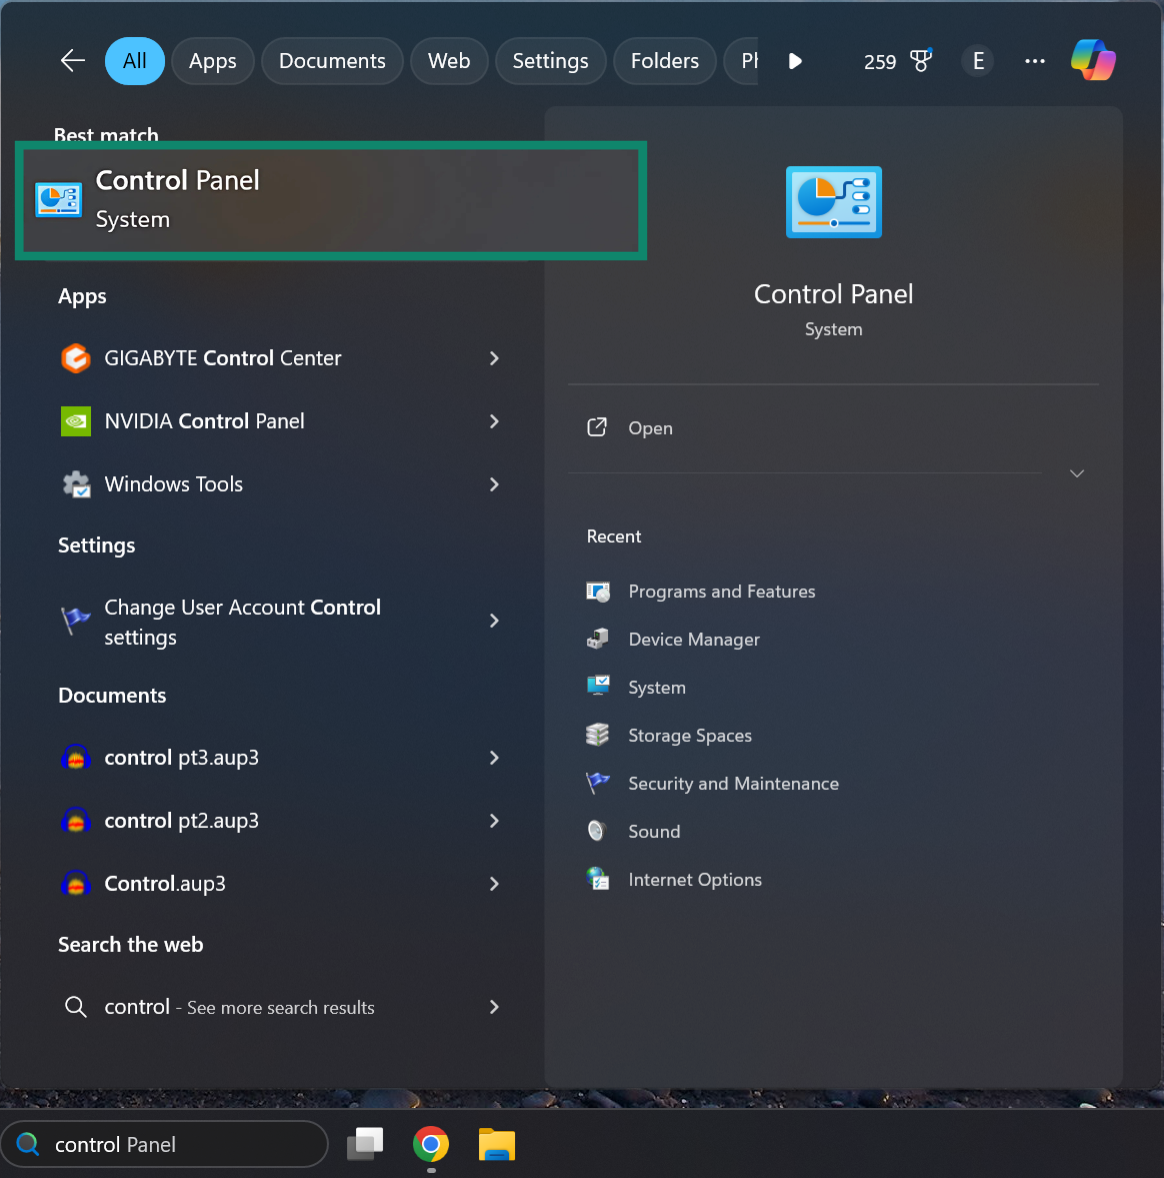
- Click on the search bar on your desktop and type Control Panel.
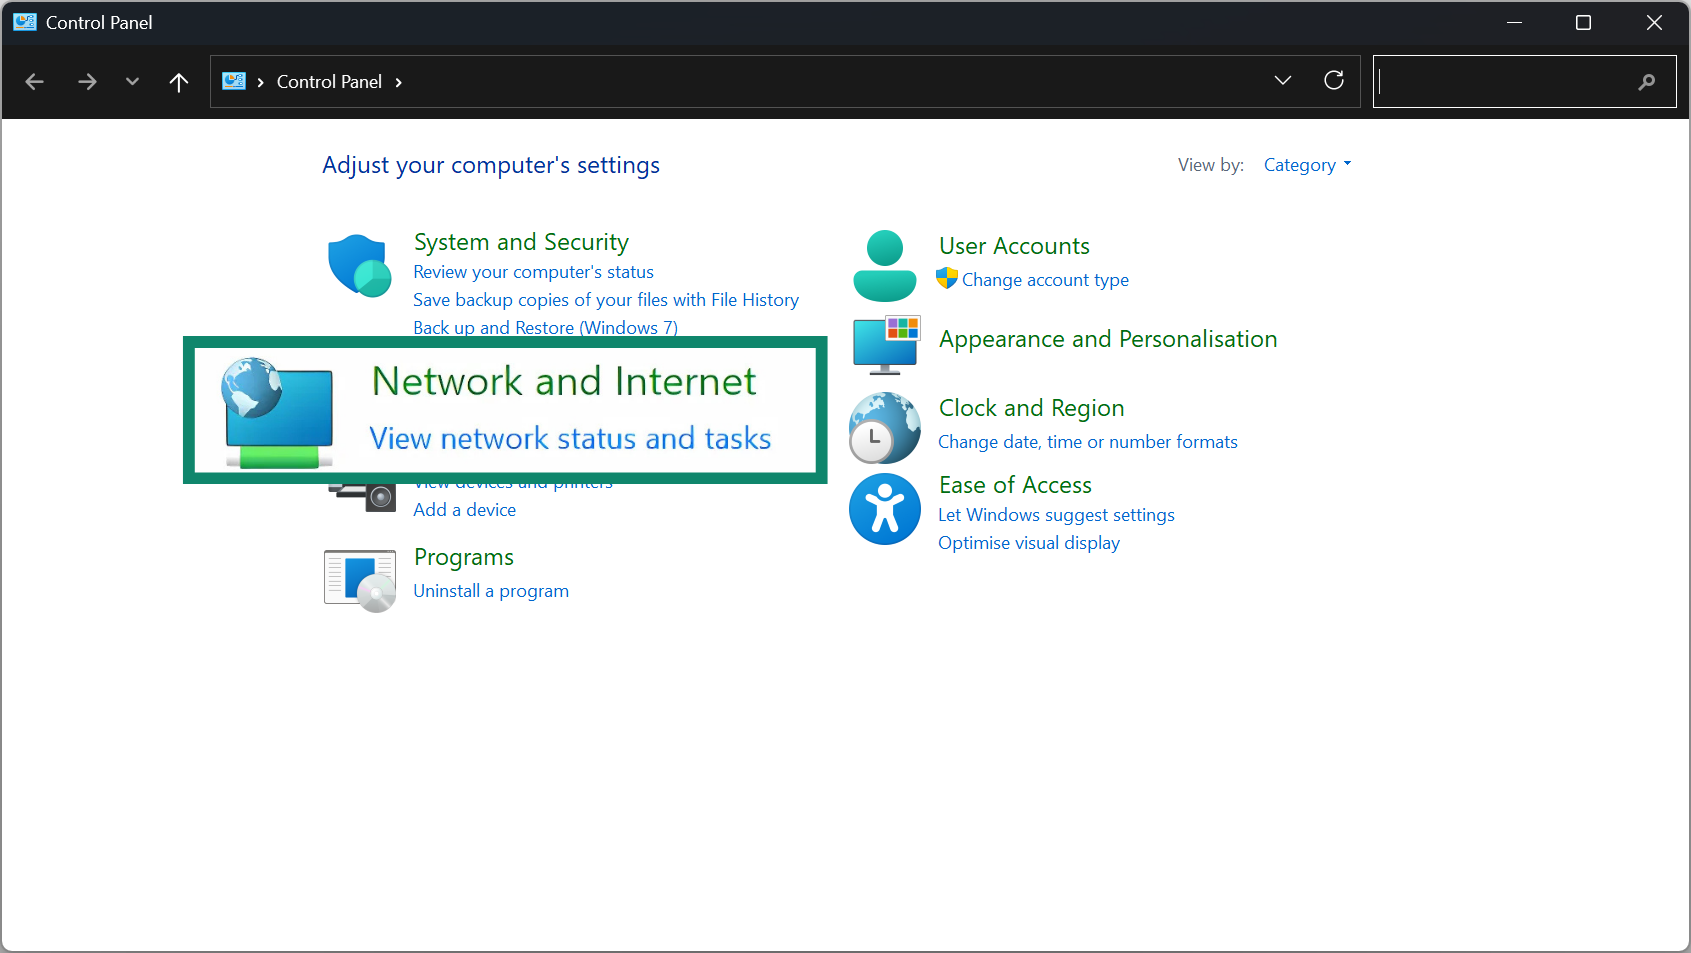
- Then select Network and Internet.
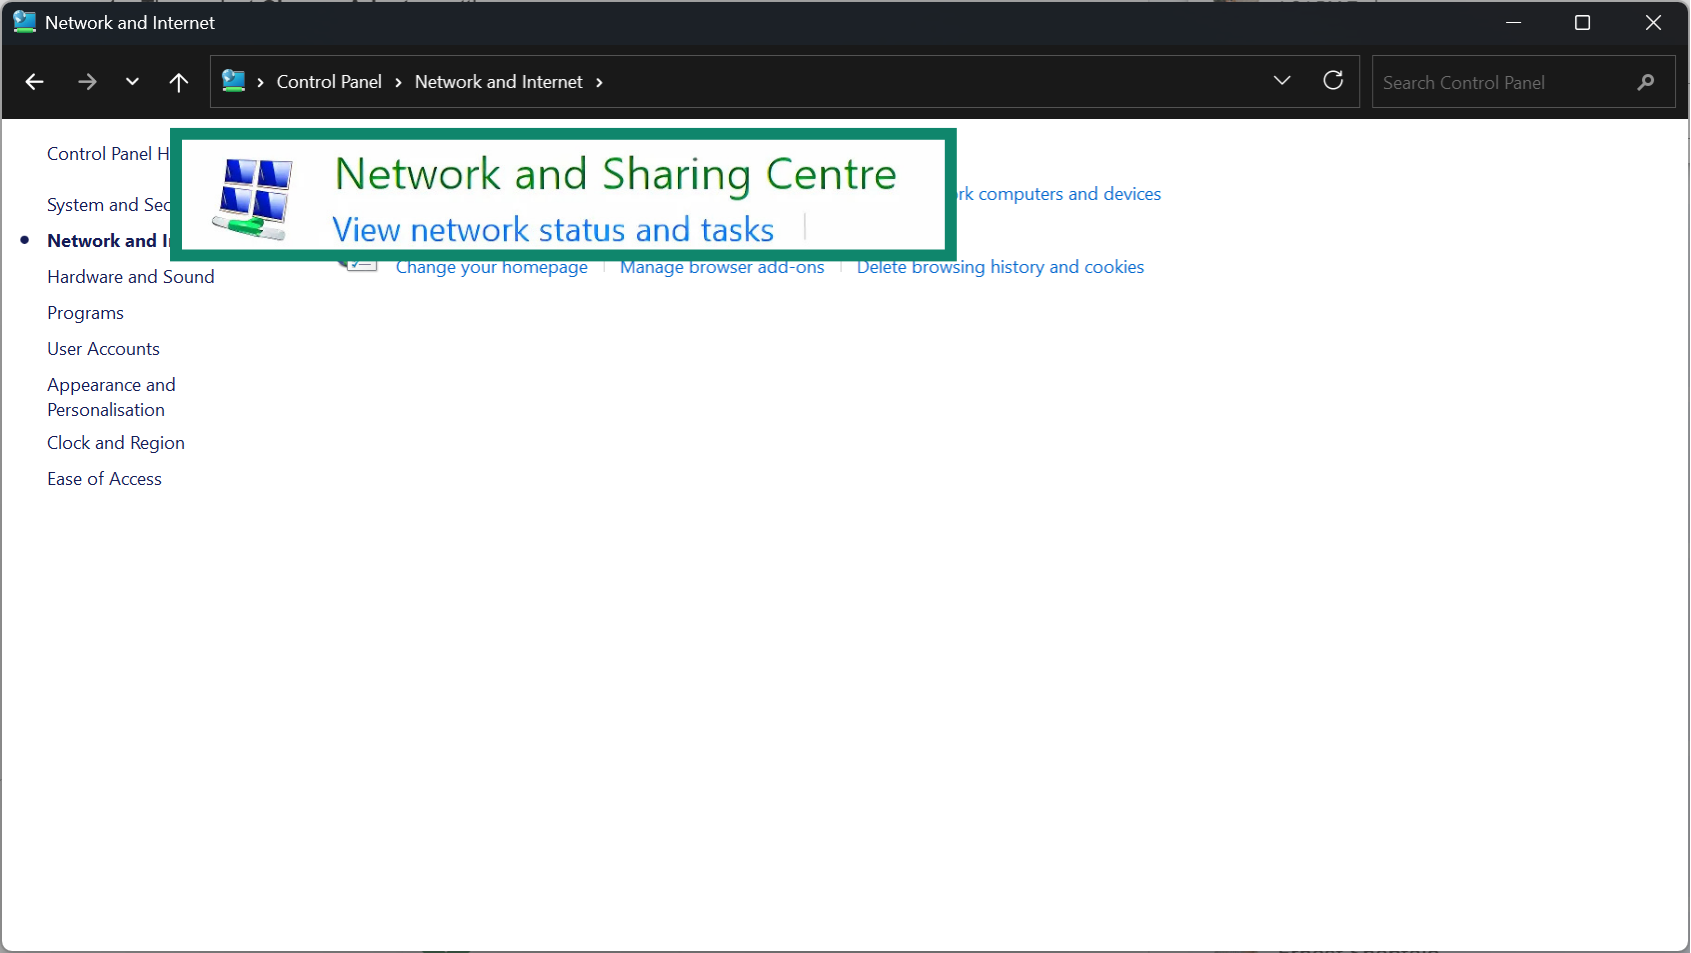
- Once inside, click on the Network and Sharing Center settings.
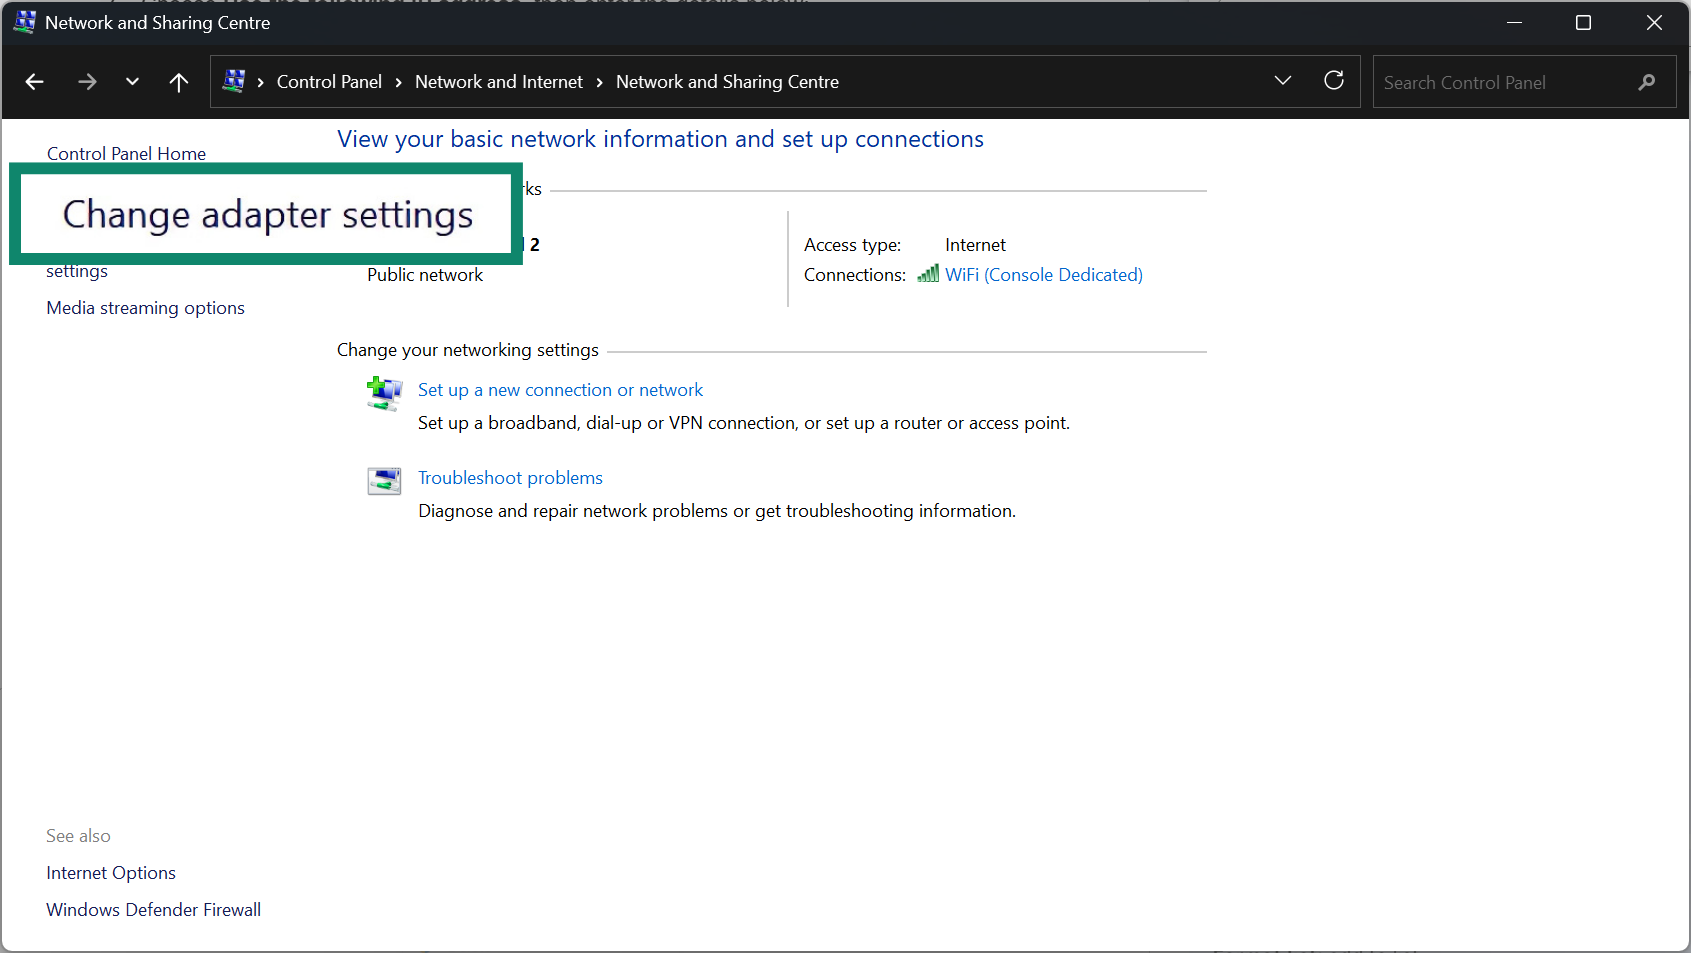
- Then select the Change adapter settings option.
- Right-click on WiFi (or Ethernet if you’re using a wired connection) and select Properties.
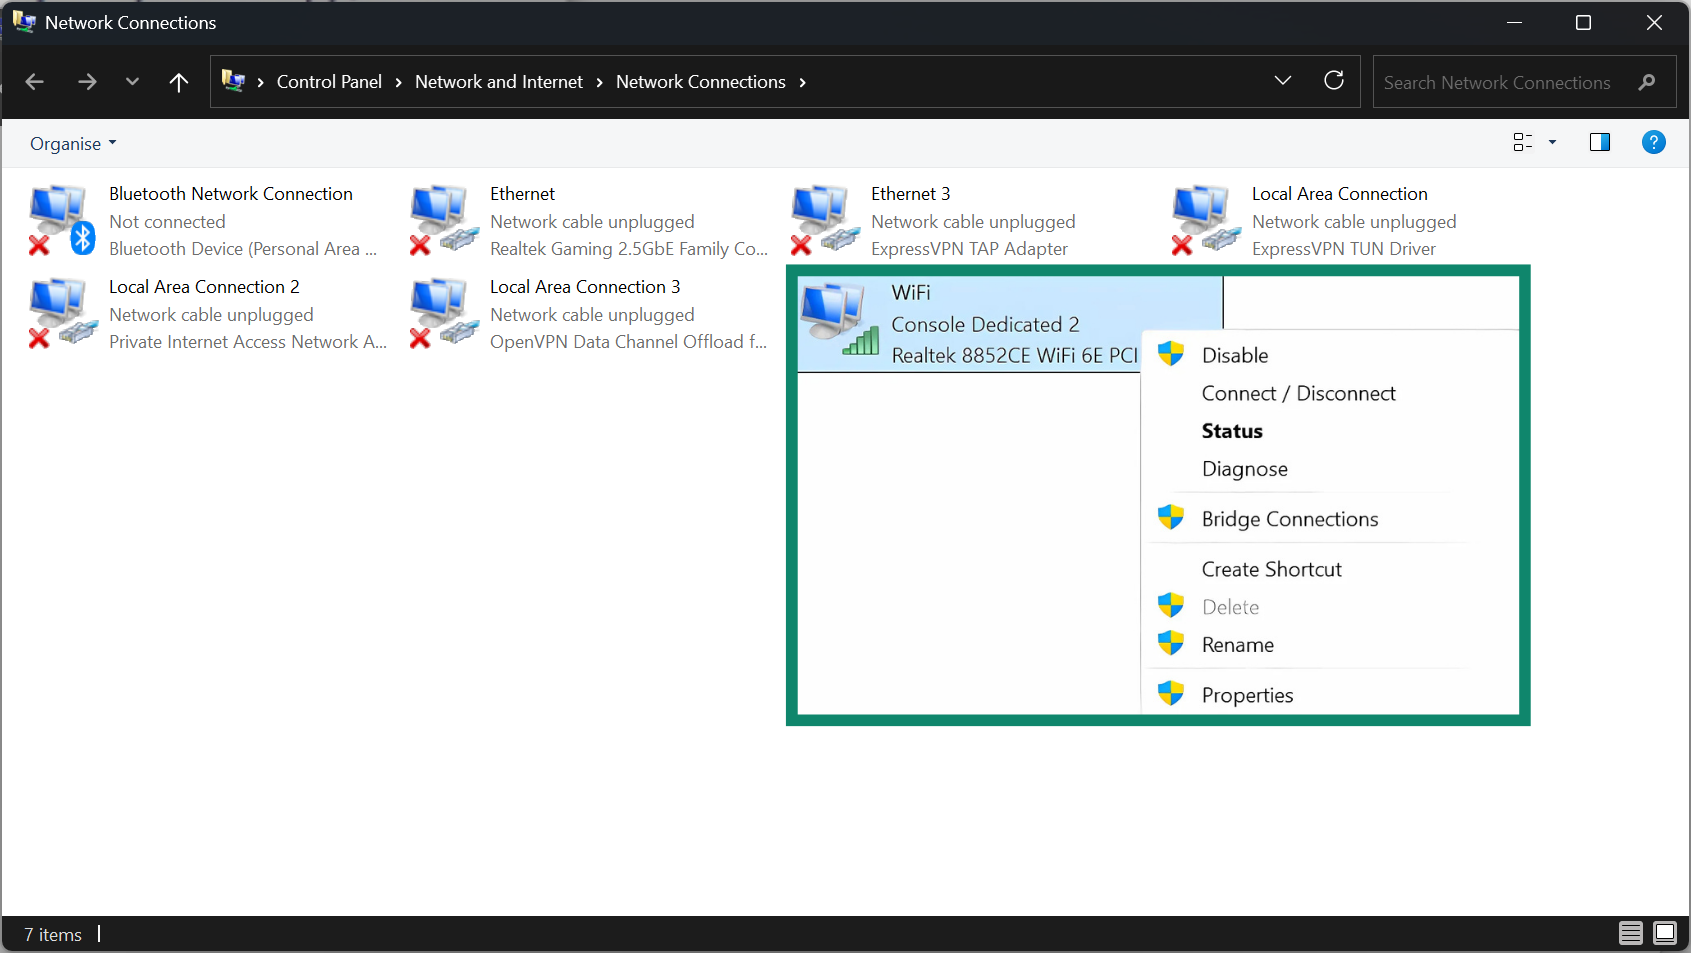
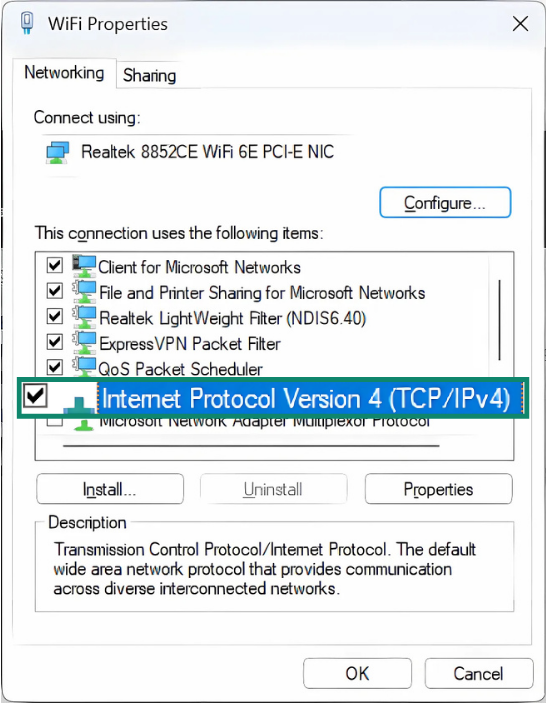
- Select Internet Protocol Version 4 (TCP/IPv4), then click on Properties. Note that you might see IPv6 rather than IPv4, in which case you can select that.
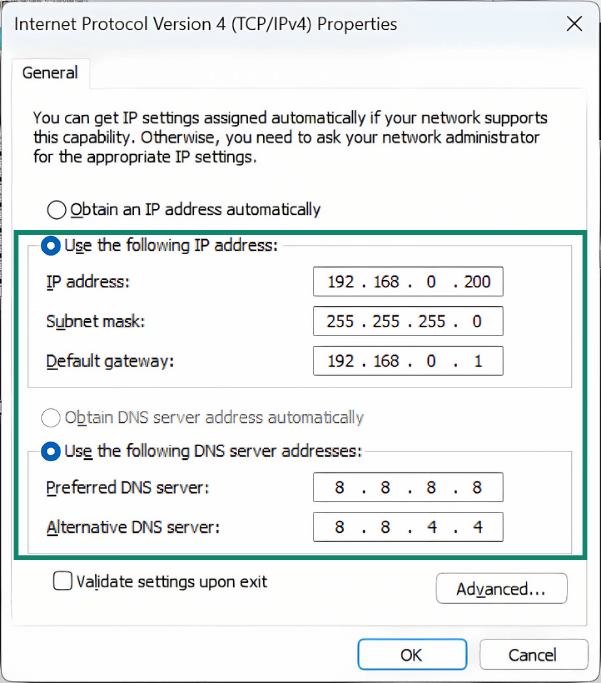
- Choose Use the following IP address, then enter the details below:
- IP address: Something that won’t clash (for example, 192.168.0.200).
- Subnet mask: Often 255.255.255.0.
- Default gateway: Your router’s IP (for example, 192.168.0.1).
- DNS servers: Could be your router’s IP or a public DNS (8.8.8.8 and 8.8.4.4).
- Press OK.
On Mac:
- Open the Apple menu and select System Settings and Network.
- Select your connection, then hit Details.
- Once inside, go to TCP/IP settings.
- Under Configure IPv6 or Configure IPv4, pick Manually.
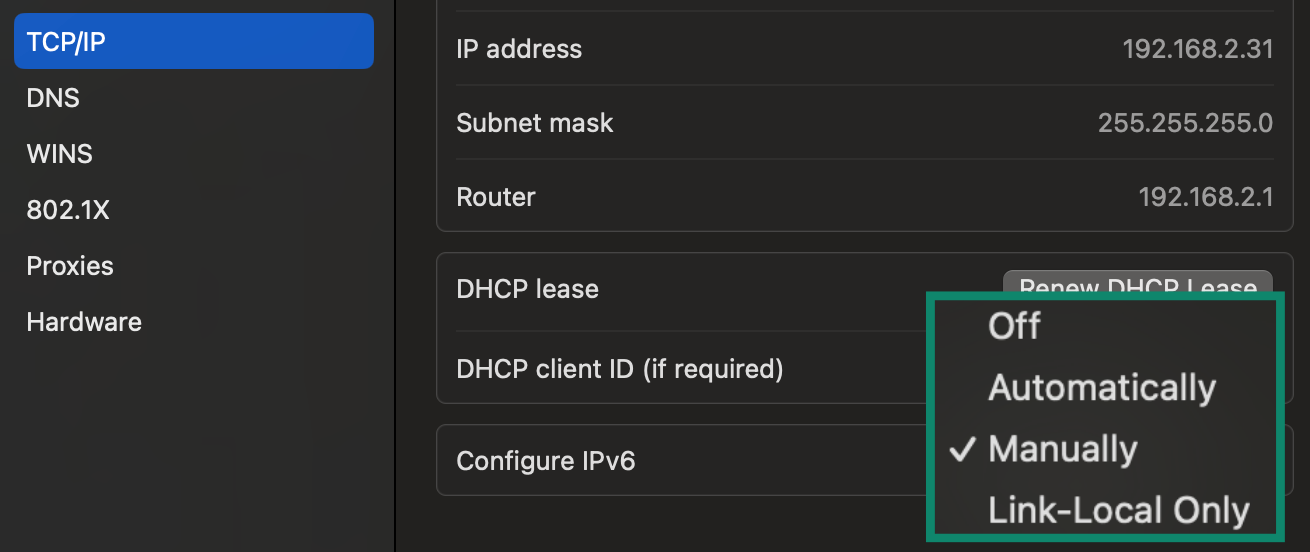
- Input your desired IP address, plus subnet mask and router IP, and confirm changes.
If needed, log into your router’s admin panel and remove that static IP from the DHCP pool. Doing so stops the router from automatically handing out the same address to another device.
Important: If you take your laptop to another network, like a friend’s house, it will still be set to that static IP, which won’t work on a different network. So if you’re using a static IP, remember to switch back to automatic/DHCP when connecting to a different network, or reserve static settings for devices that stay in one place (like printers or game consoles).
4. Reset network settings on your device
If your system’s network settings got corrupted, a reset will restore defaults and remove old data that might cause conflicts. Keep in mind that this is the nuclear option: your internet won’t work until a reboot, and there’s a possibility that the process might break something, leaving you in a situation where your device can't connect to a network.
Overall, this is a last resort for the device experiencing the conflict and should only be tried once you’ve tried everything else. All that said, here’s what to do:
On Windows:
There’s a handy feature called Network Reset in Windows 10 and 11. It will remove and reinstall all your network adapters and set all networking components back to their original state. Your PC will restart as part of the process.
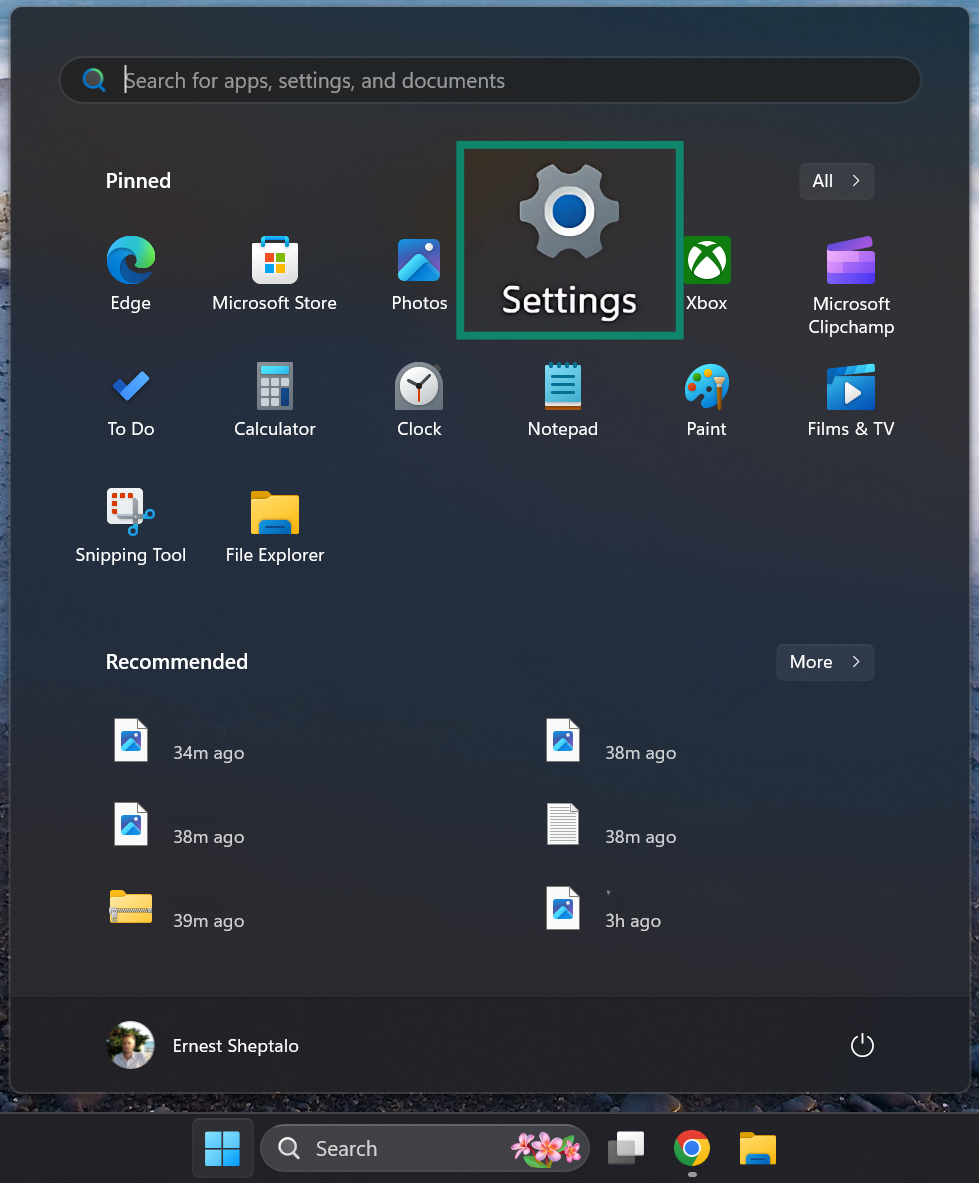
- Click on the Windows button and select Settings.
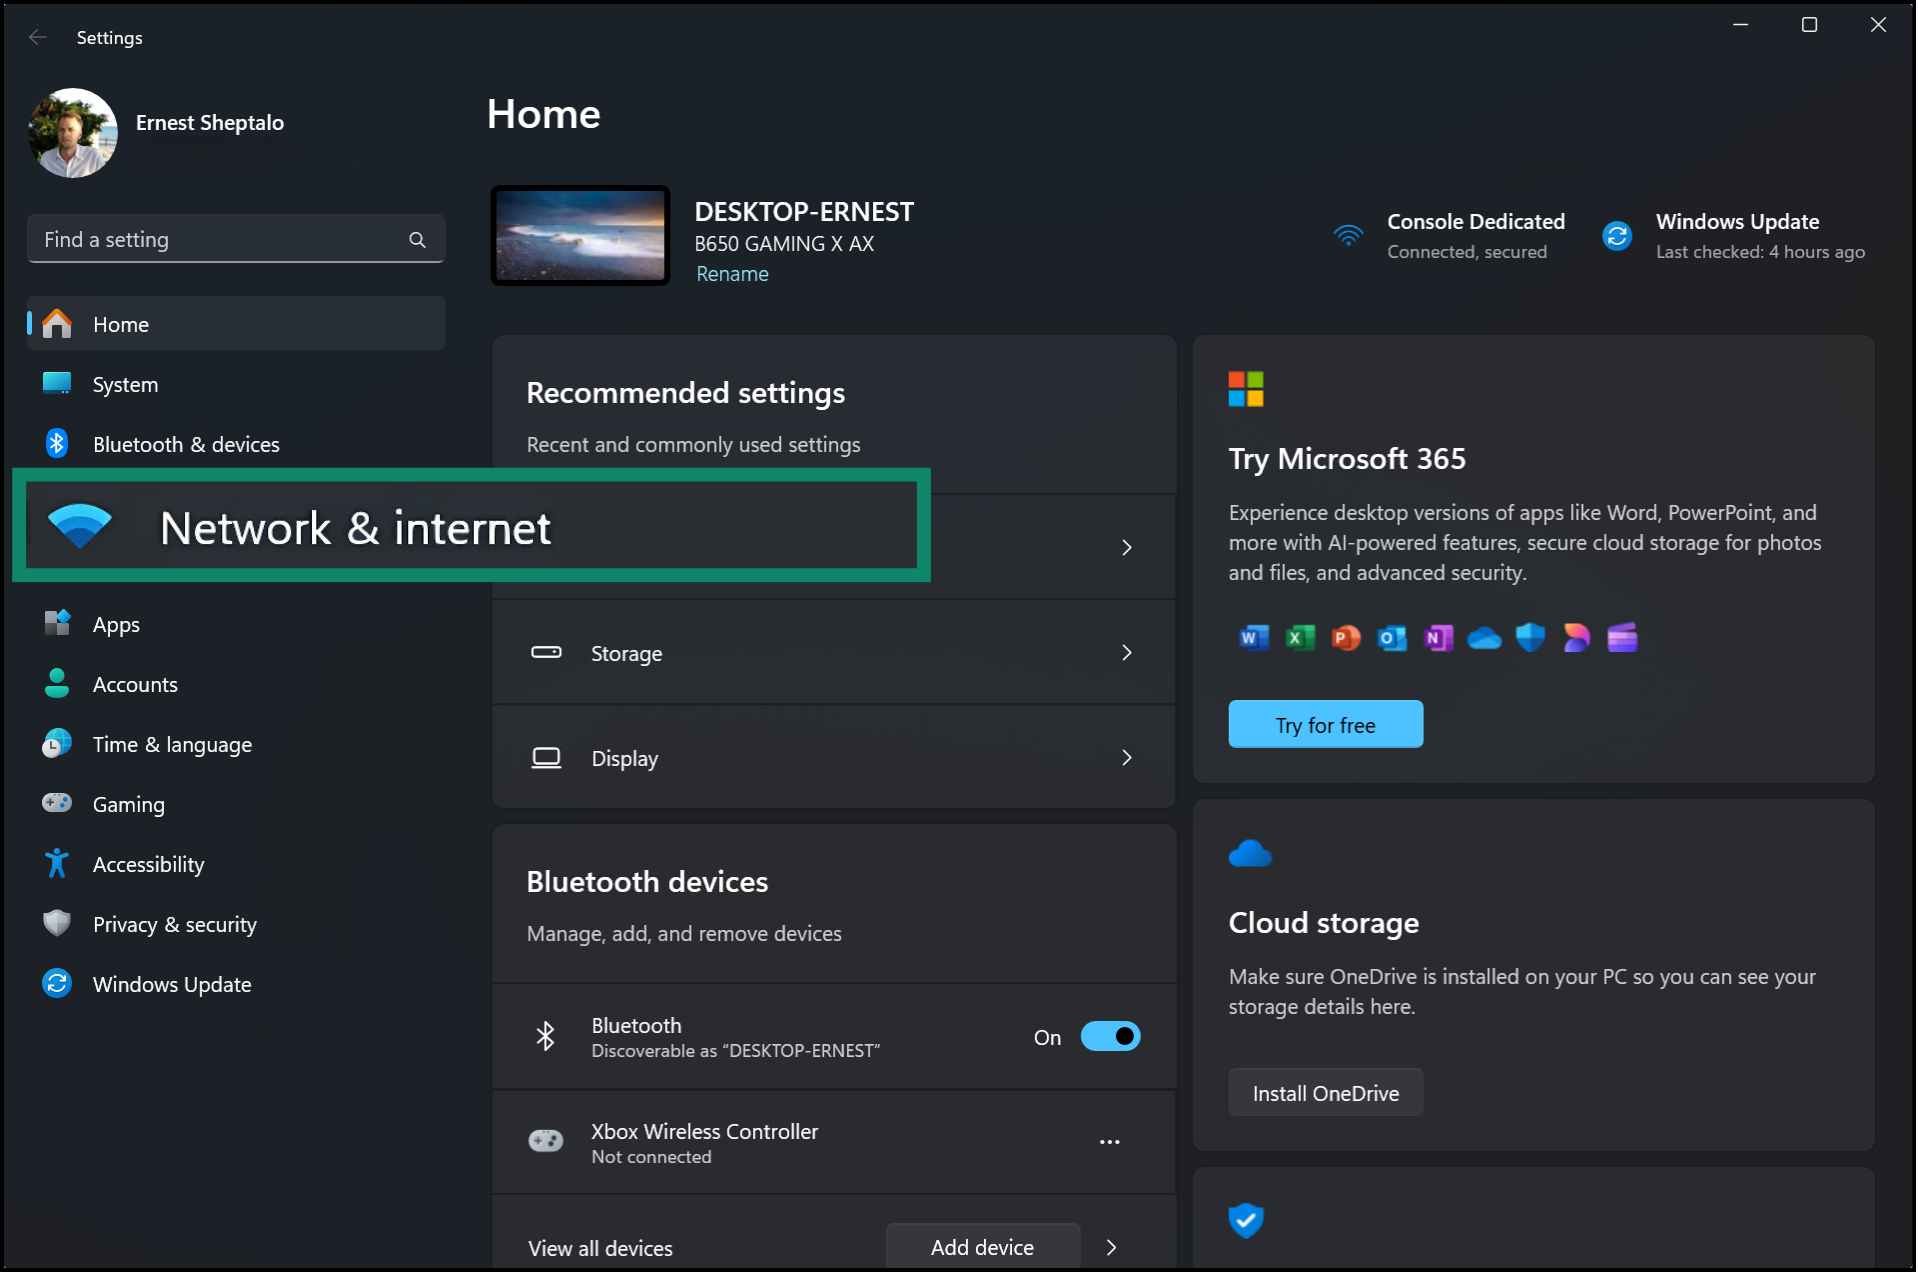
- Pick the Network & Internet tab.
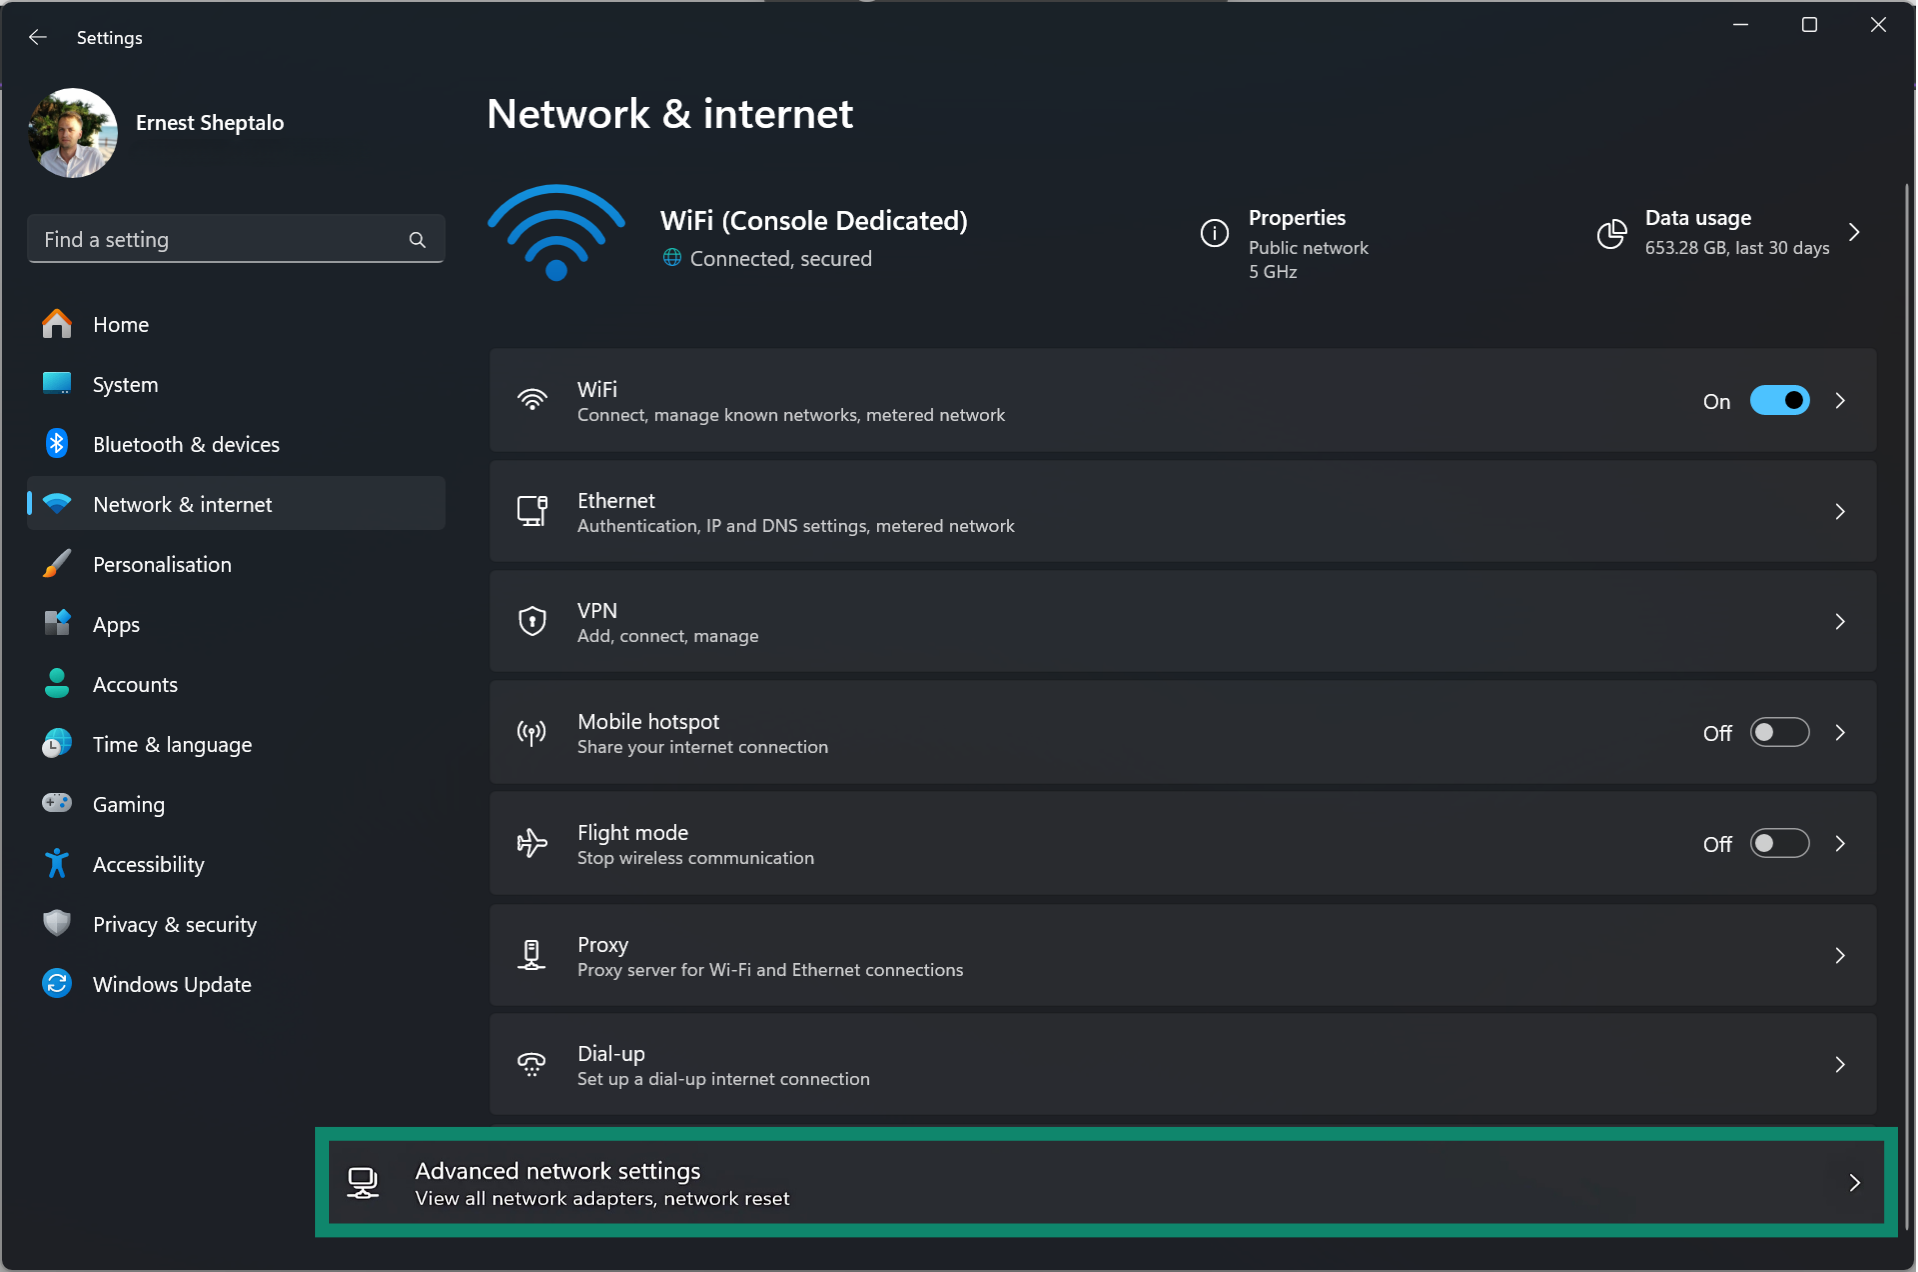
- Then select Status (or Advanced network settings).
- Click on the Network reset option.
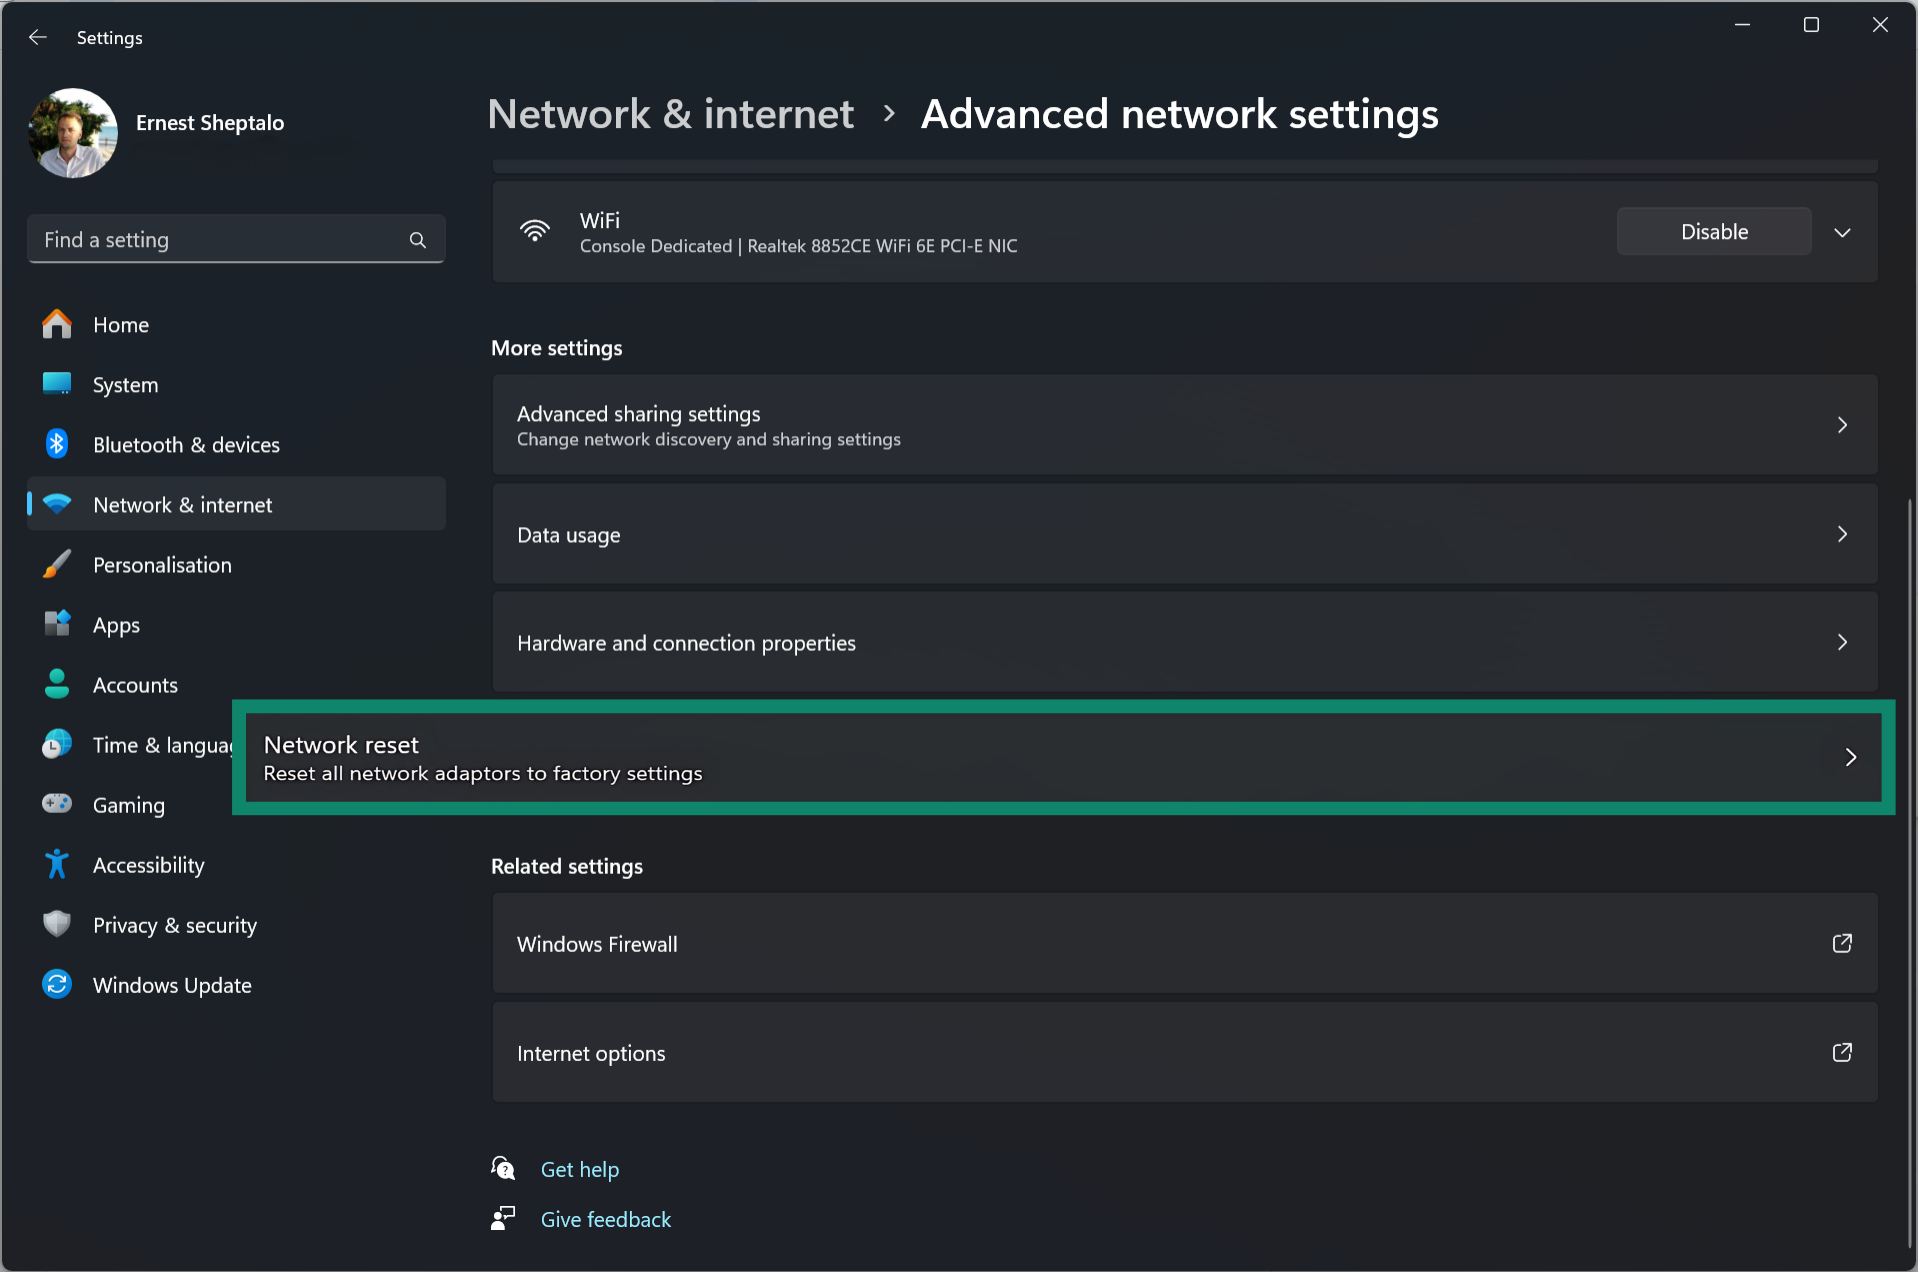
- Press the Reset now button to initiate the process.

Alternatively, advanced users can run a couple of commands in the Command Prompt:
- Press Win + R to open the Run dialog, type “CMD,” and click OK.
- In the Command Prompt, type “netsh winsock reset.”
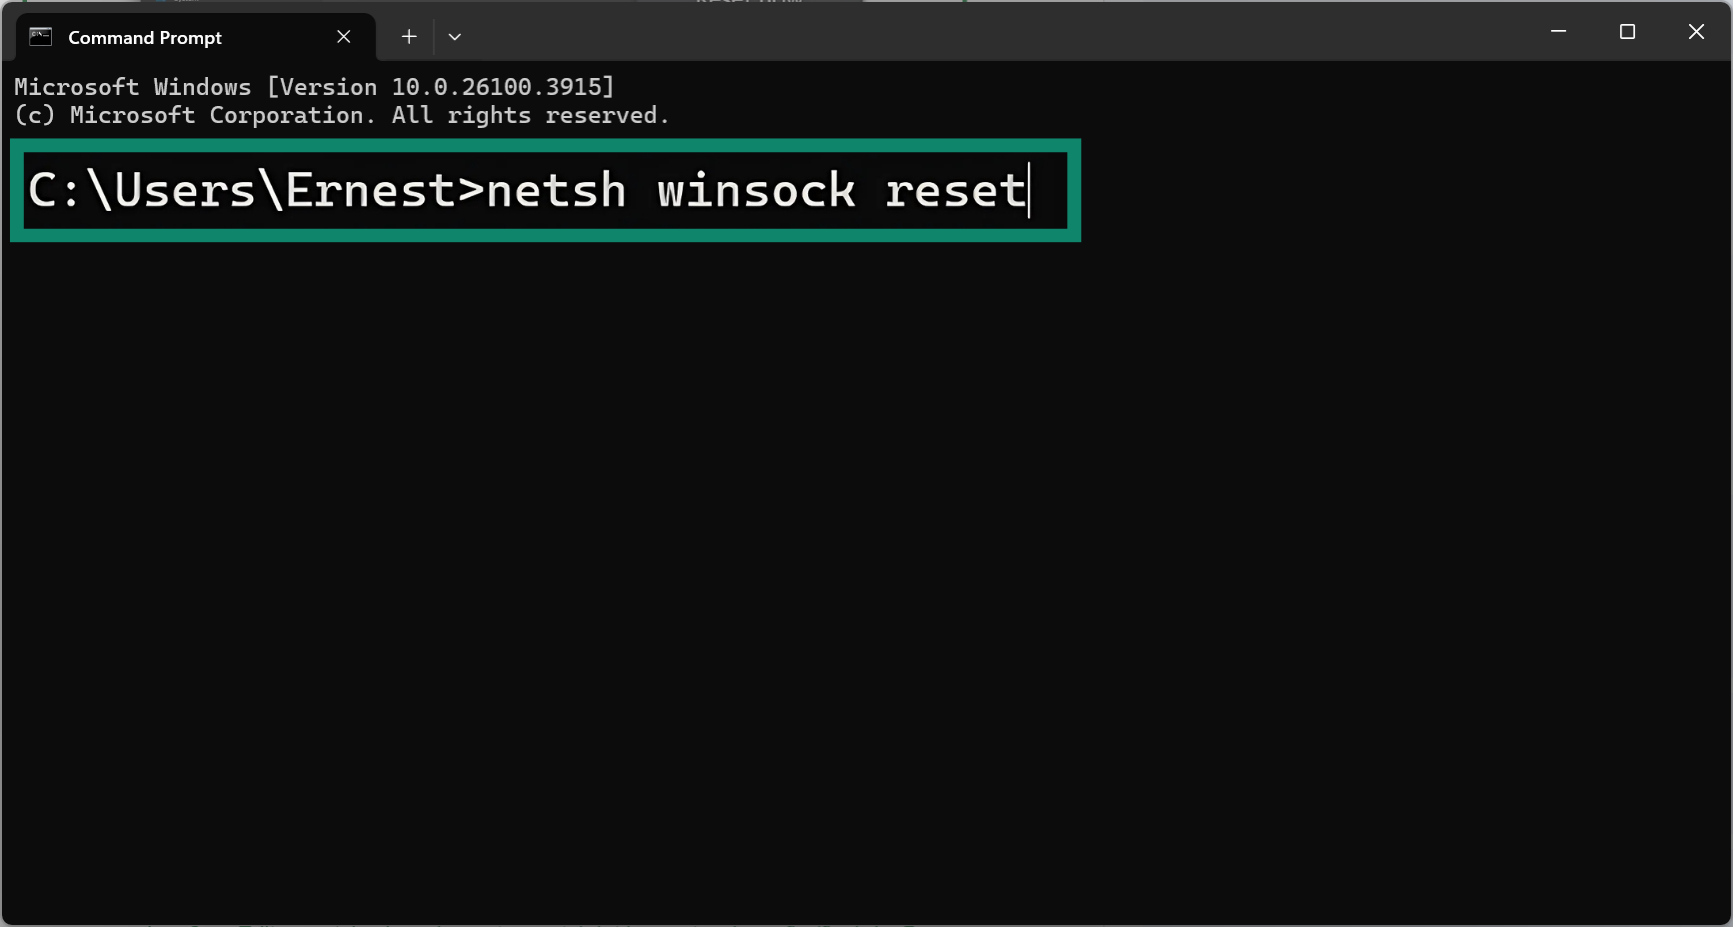
- Then type “netsh int ip reset” and press Enter.
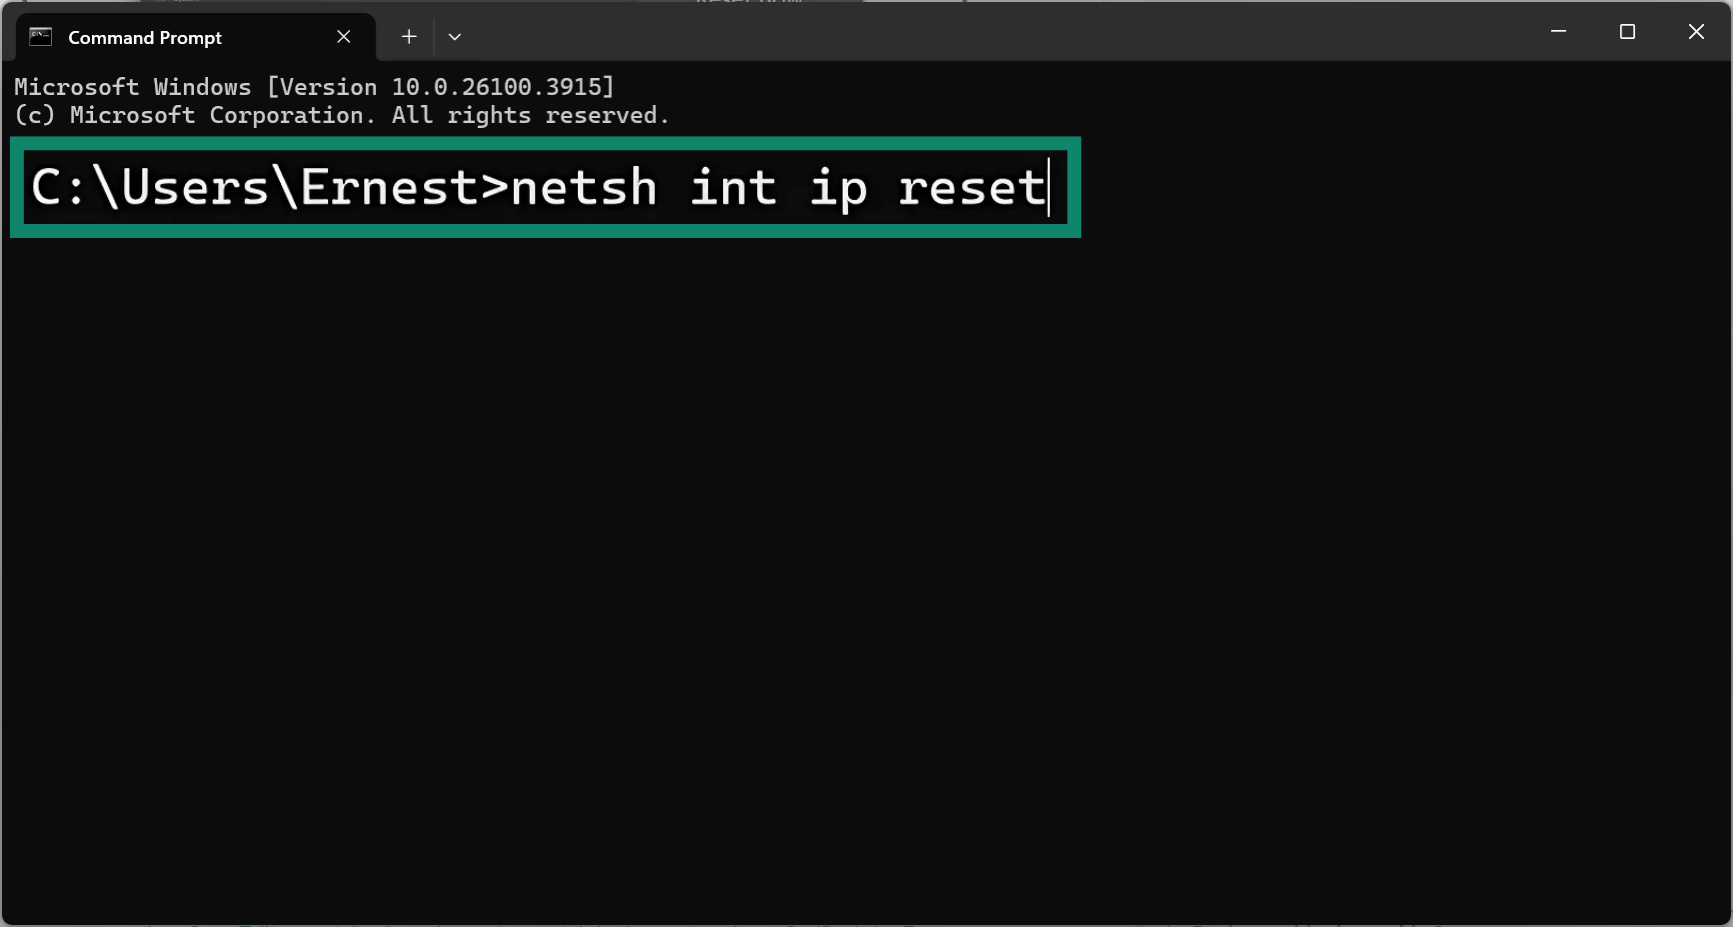
- After these commands, reboot the PC.

After reboot, you’ll also need to reconnect to your Wi-Fi (and re-enter the password) or reconfigure any virtual private networks (VPNs), etc., because it wipes saved networks. This can clear out any bad configs or caches that might be stopping the IP conflict from resolving.
On Mac:
Resetting network settings involves removing existing configurations:
-
- Open the Apple menu and select System Settings, then Network.
- Pick the connection in use and select Details (or Advanced).
- Under the DNS tab, remove saved Wi-Fi networks or any custom DNS entries by selecting them and clicking Forget This Network.
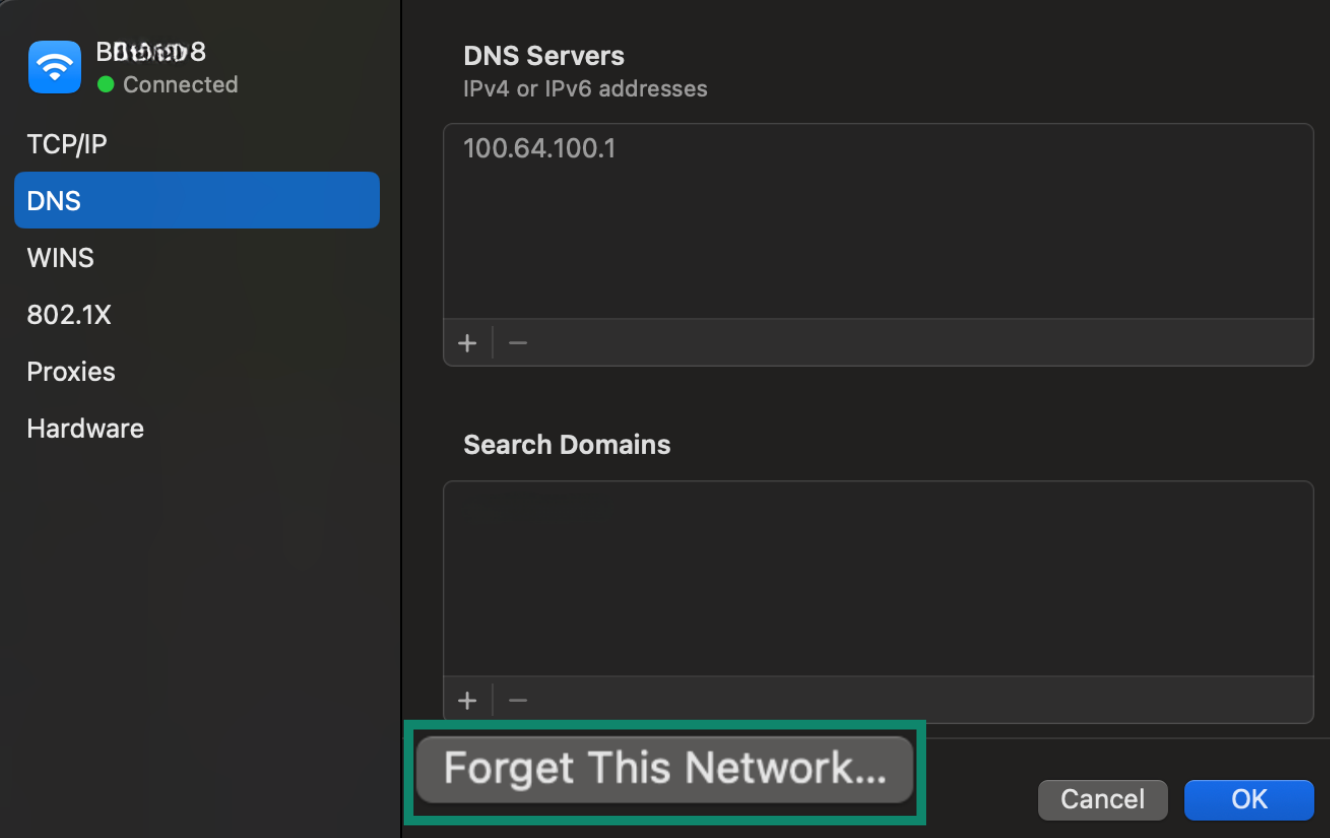
- Save changes, then rejoin your network.
- Open the Apple menu and select System Settings, then Network.
That step often eliminates leftover data that triggers IP conflict error notifications.
5. Check for malware that manipulates IP settings
Malware or bad actors can sometimes cause IP conflicts by tampering with network settings or mimicking a DHCP server. An unauthorized device on your Wi-Fi might also manually use your IP. If the issue recurs without a clear reason, it’s worth checking for malicious activity.
| Scan your devices for malware | Run a full antivirus scan on the affected computer using a trusted anti-malware tool. If malware has altered your network settings or is hijacking an IP, the scan could detect and remove it. |
| Look for rogue DHCP servers | This is a more advanced step, but if you have many devices or a complex setup, make sure only your main router is acting as the DHCP server. A rogue DHCP, possibly from malware or a misconfigured device, can cause IP conflicts.
To check, you can temporarily disable DHCP on your router. If devices still receive IP addresses, something else is handing them out, which signals a problem. While this isn’t usually an issue on basic home networks, it’s worth checking if you’re using multiple networking devices. |
| Media Access Control (MAC) address spoofing attack | In rare cases, an attacker might spoof your device’s MAC address and IP to impersonate it on the network.
This is unlikely on a home network, but if you suspect it, secure your network by changing your Wi-Fi password and consider enabling MAC address filtering on your router. |
To reduce the risk of malware-related IP issues in the future, consider using ExpressVPN with a dedicated IP that maintains anonymity. It keeps your online activity private while giving you a consistent IP address that’s less likely to trigger conflicts or draw unwanted attention.
6. Contact your ISP if the issue persists
If every fix fails, it might be a deeper network problem. Your internet service provider (ISP) can run diagnostics and see if your connection is stable. In some cases, they might swap out faulty hardware or adjust settings on their end.
Preventing future IP address conflicts
Avoid repeat problems by tuning your network so each device receives a unique address. A few key methods keep things organized:
Setting up static IPs for key devices
If you have certain devices that are always on your network and you want them to have a stable, unchanging address, consider giving them static IP addresses. As we did in the fix above, assigning static IPs can eliminate conflicts by removing reliance on DHCP (for those devices).
Enabling DHCP reservation on your router
Most modern routers include a DHCP reservation feature. It lets you link a device’s MAC address to a specific IP address. You essentially tell the router, “Whenever device X asks for an IP, give it this specific number.” This prevents IP conflicts by guaranteeing unique, consistent IPs for those devices without manual configuration on the device side.
Regularly updating firmware and network settings
A router with outdated firmware can mishandle IP distribution. Check the manufacturer’s website or your router’s admin panel for updates. In addition:
- Keep an eye on your device list to ensure no duplicates appear.
- Revisit DHCP ranges if new devices or routers join the setup.
A bit of proactive maintenance goes a long way toward a stable network.
Bonus tip: While you're looking into IP addresses, keep in mind that your public IP (the one visible to websites) is different from your local IPs. If you're worried about privacy or tracking, a virtual private network (VPN) like ExpressVPN can help. It hides your public IP and encrypts your connection, making it harder for outsiders to monitor your activity. It won’t change your local network setup, but it adds an important layer of protection, especially on public Wi-Fi.
FAQ: Common questions about IP conflicts
Why does my device keep getting an IP conflict?
Your device likely shares the same IP address with another device on the network. This can happen due to static IP settings, Dynamic Host Configuration Protocol (DHCP) misconfigurations, or devices reconnecting too quickly and reclaiming old addresses. In rare cases, malware or a misbehaving device could be the cause. You can usually fix the issue by restarting your router and affected devices, but persistent issues might require checking static IPs, DHCP settings, or scanning for malware.
Can two devices have the same IP address?
Not on the same network; each device must have a unique IP address to communicate properly. If two devices are assigned the same IP (manually or due to a network error), it causes an IP conflict. This can lead to one or both devices losing connectivity. These conflicts are usually resolved by restarting your router or checking that no devices are using static IPs that overlap.
How do I release and renew an IP address on different devices?
What should I do if another device is using my IP address?
Start by restarting your router and the affected device. This often resolves IP conflicts automatically. If the issue persists, try these steps:
- Release and renew your IP address on the affected device (via Command Prompt on Windows or Renew Lease on macOS).
- Check your router’s Dynamic Host Configuration Protocol (DHCP) settings to ensure it’s assigning unique IPs and there’s no static IP conflict.
- Restart or disconnect other devices one by one to find the one causing the conflict.
- Assign a static IP address outside your router’s DHCP range if you need a permanent fix.
- Scan for malware or unknown devices; in rare cases, the conflict might be caused by a rogue or malicious actor on your network.
What does it mean if someone is using my IP address?
It usually means another device on your network is using the same local IP as yours, causing a conflict. This can happen due to a misconfigured device, a static IP overlap, or, more rarely, unauthorized access. On home networks, it’s often harmless: a printer or phone may have accidentally grabbed the same address.
But if you consistently see the error and don’t recognize all connected devices, it could indicate someone else is on your Wi-Fi. In that case, consider changing your Wi-Fi password and checking your router’s device list.
How to find out what device is using an IP address?
You can check your router’s admin panel to see which devices are connected and their assigned IP addresses. Log into your router (usually by entering something like 192.168.0.1 or 192.168.1.1 in a browser), then look for a section called “Device List,” “Attached Devices,” or “DHCP Clients.” It will show device names, IP addresses, and sometimes Media Access Control (MAC) addresses.
From there, you can identify unfamiliar devices and see which one is using the IP address in question. If you're unsure which device is which, comparing MAC addresses to those on your devices can help.
How can I prevent IP conflicts in the future?
You need to use Dynamic Host Configuration Protocol (DHCP) and avoid manually setting static IPs unless necessary. Most IP conflicts happen when two devices are accidentally assigned the same address. To prevent this, keep your router’s DHCP enabled so it manages IPs automatically.
If you need to assign static IPs for printers or servers, make sure they’re outside the DHCP range. Also, reboot your router occasionally to refresh the network, and keep firmware updated to avoid glitches. Those steps help maintain a smooth environment, so you won’t see repeated messages about duplicate IP addresses detected or “IP address already in use.”
What are the best router settings to avoid IP conflicts?
Enable Dynamic Host Configuration Protocol (DHCP) reservation on your router. Set a reasonable IP address range, and reserve IPs for critical devices. Using DHCP ensures your router automatically assigns IP addresses without overlap. Set a DHCP range that fits your number of devices; for example, from 192.168.1.100 to 192.168.1.200.
For important devices like printers or desktop PCs, use DHCP reservations (also called static leases) so they always get the same IP. Avoid manually assigning static IPs within the DHCP range unless you're reserving them through the router. If you’re uncertain, consult your router manual or reach out to your internet service provider (ISP) for guidance.
Take the first step to protect yourself online. Try ExpressVPN risk-free.
Get ExpressVPN